How to add a key to the Marketplace

The process is very simple, takes no more than 10 minutes, and requires nothing more than a Binance account and email.
* Security Reminder**: Before creating the API key on Binance, you must enable two-factor verification.
** Service Peculiarity: Your API key will be considered invalid as long as it has no historical futures trades. You need to have at least 1 action (deposit, trade, or withdrawal) on the Binance futures account before adding your API key to the TradeLink Marketplace.
*** Before trying to create an API key, you need to have at least $1 deposited to the Binance futures wallet.
Contents
How do I create an API key on Binance?
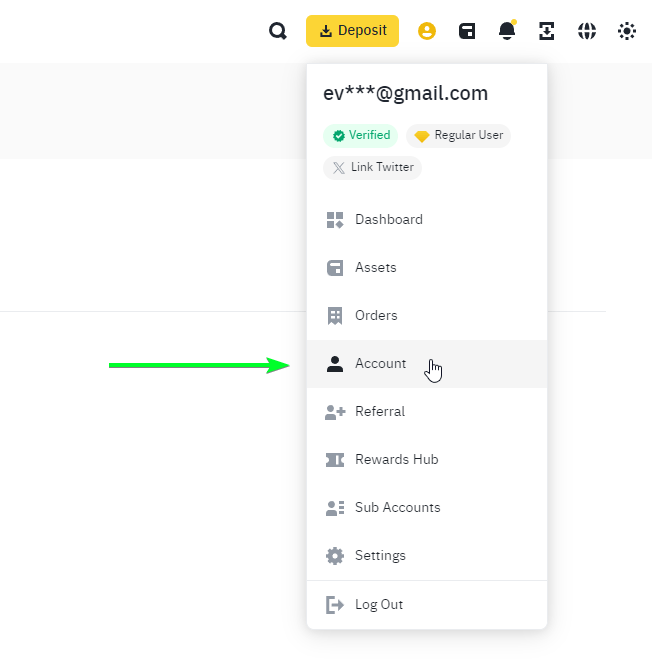
1. After logging in to your Binance account, go to the “Account” tab in the account drop-down menu. Or simply use this link, and skip the next step
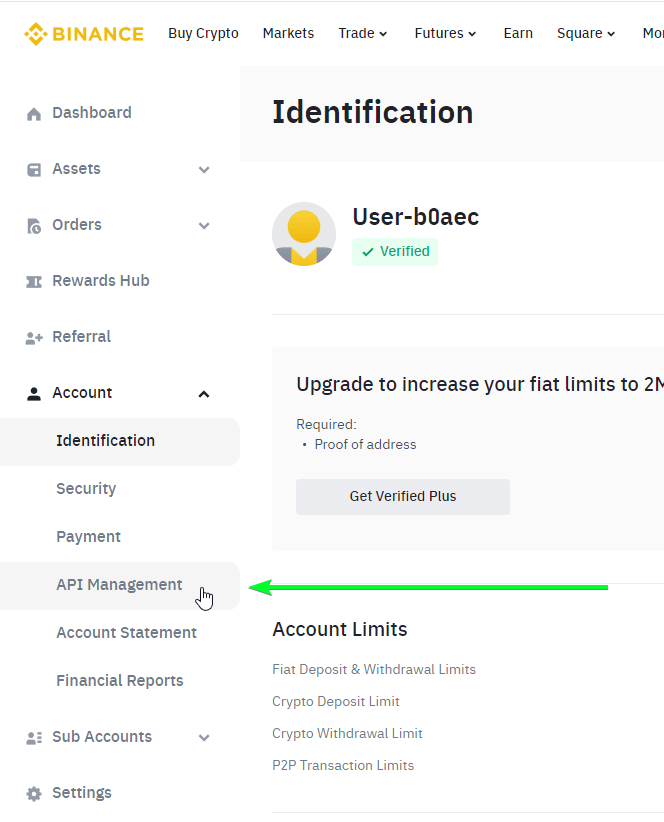
2. Go to the “API management” tab in the left menu of the “Account” page
3. The page you were transferred to should look something like this:
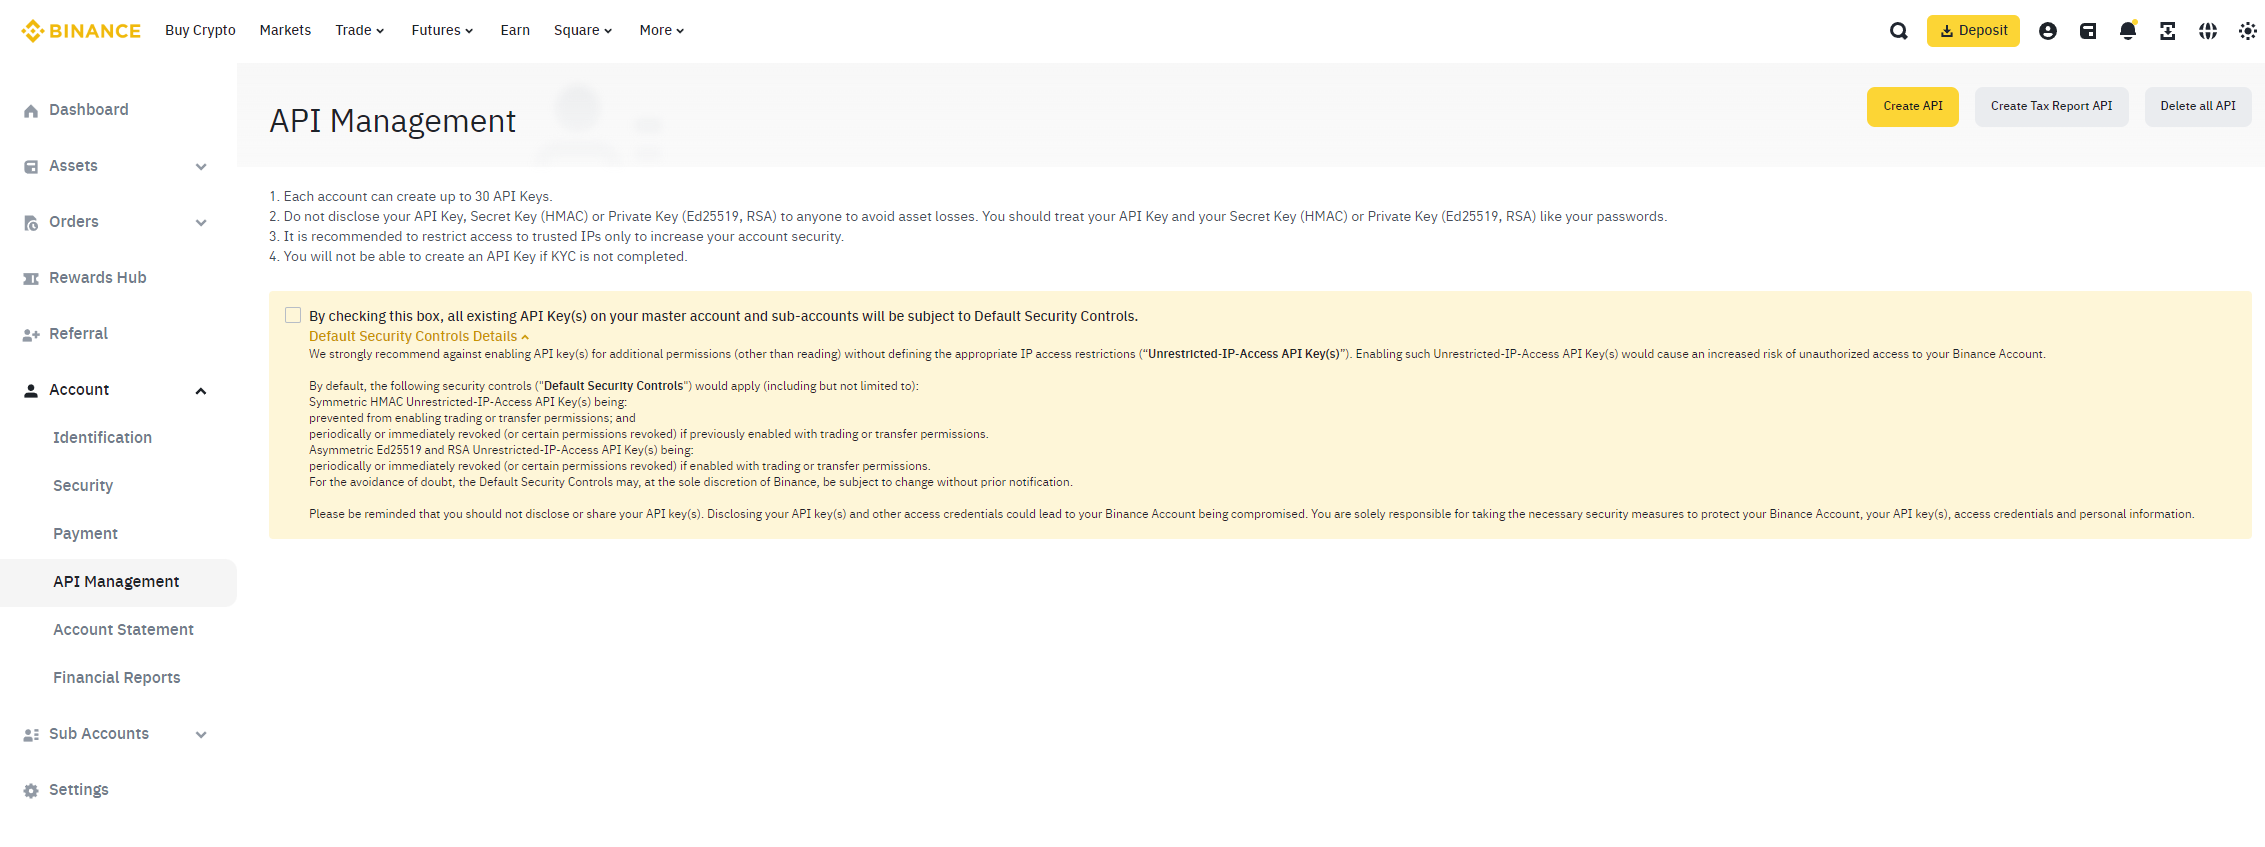
4. Before going further, let’s resolve a very important question that will be crucial for your API key stability
Optional API key security settings by Binance
As you can see, there is a very big orange element located on the page. Let’s investigate a bit further what this little checkbox has to do with all of your API keys.

This checkmark is on by default and allows Binance to restrict your API keys at any time without your notification. We had several cases where Binance removed trading permissions for the API key, only to further understand that the user hadn’t turned off this checkmark, which made it possible for Binance to do actions that were not requested by the user.
That being said, the TradeLink platform supports all kinds of Binance API key settings and will function normally in case of any unexpected restrictions from the Binance side: for example, your investment will be stopped with the notification, and the stop reason to simplify the future investigation.
We prefer that users turn this checkmark off for easier work with API keys.
How to create a read-only API key for TradeLink Marketplace?
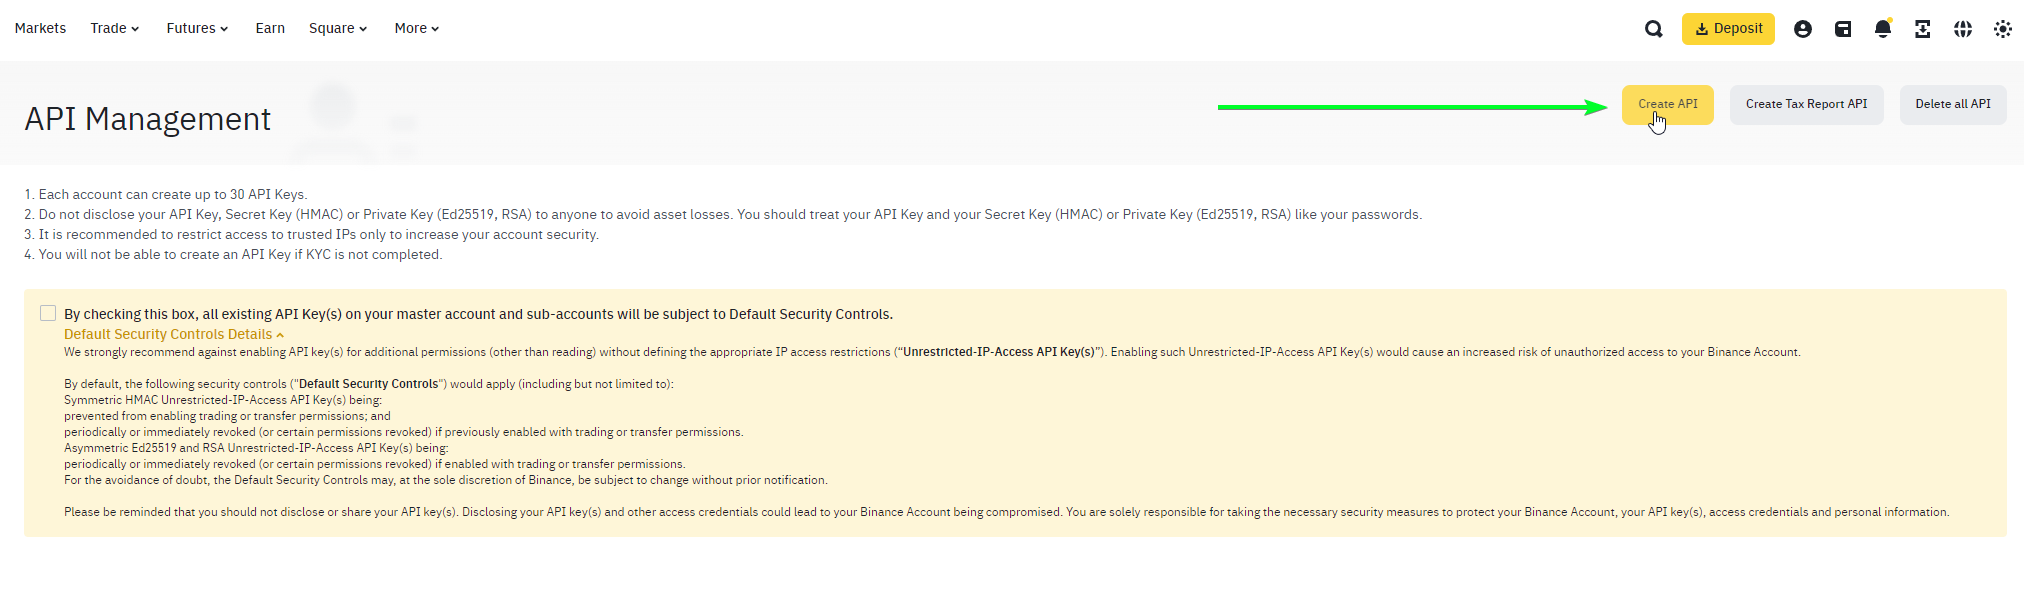
1. On the API keys management page, click the “Create API” button
2. The modal window will pop up, where you will be given a choice for the type of generated key. Please, select “System Generated”
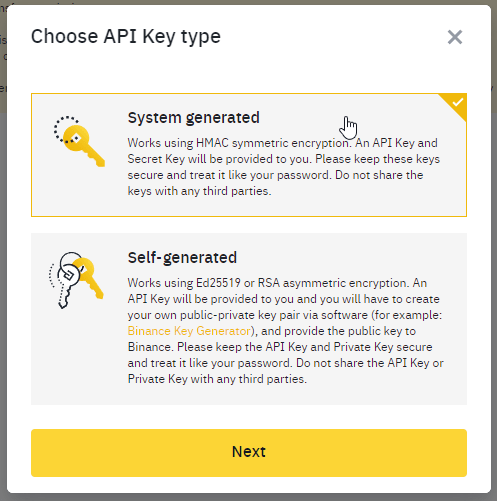
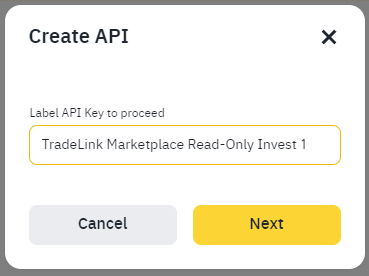
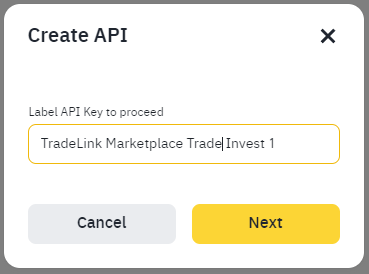
3. Select a name for your key. We recommend naming your keys with easy-to-understand logic in mind, to understand the service you provided this key in the future
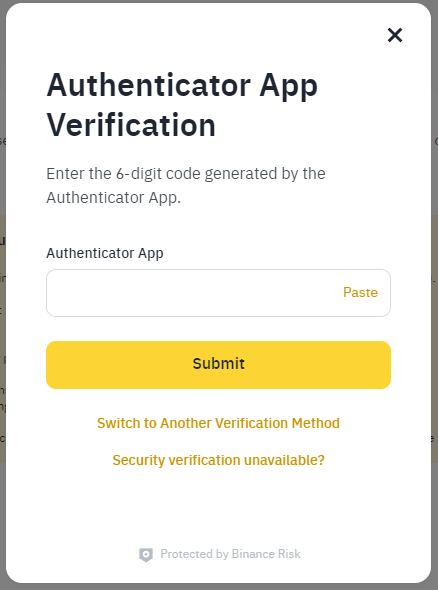
4. Confirm key creation by entering the 2-factor auth code
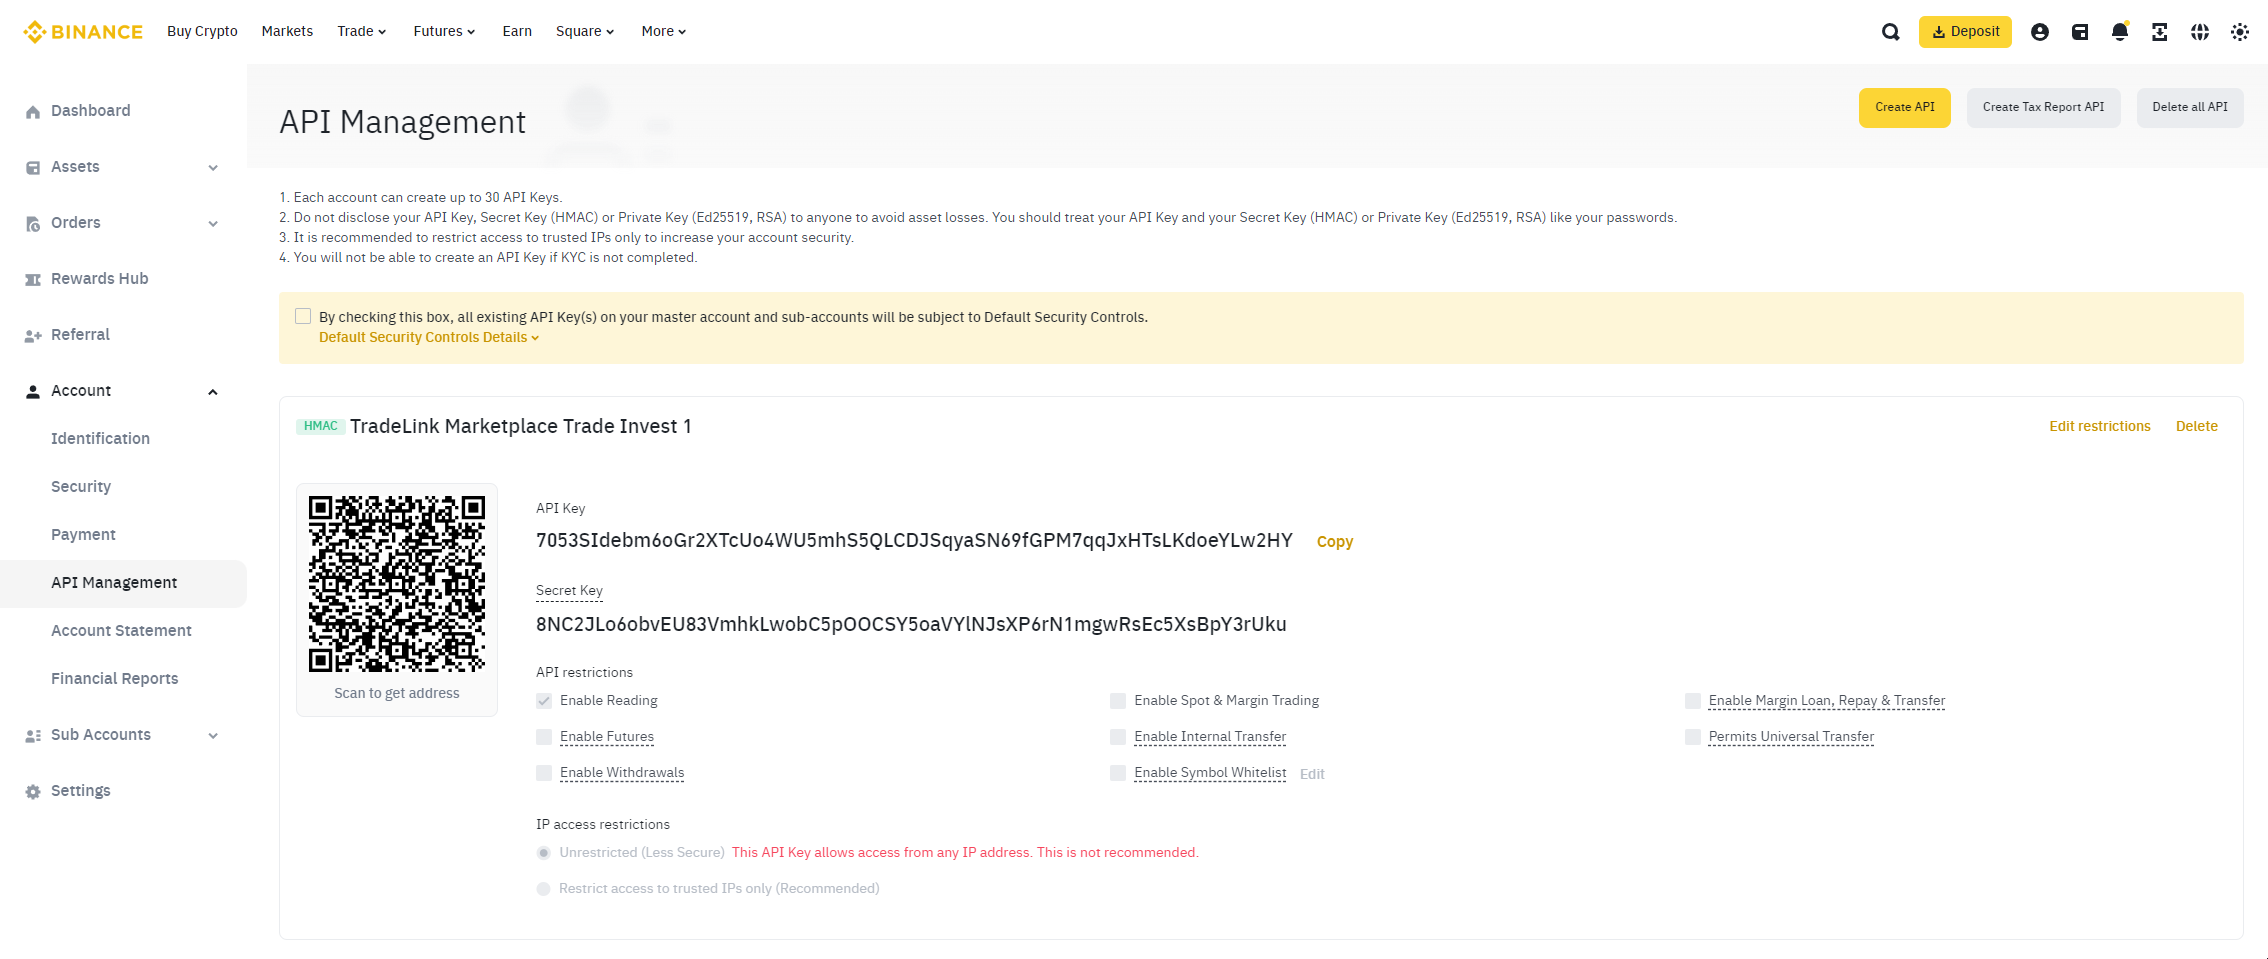
5. Congratulations! You’ve created your read-only API key. Now your page should look something similar to the image below
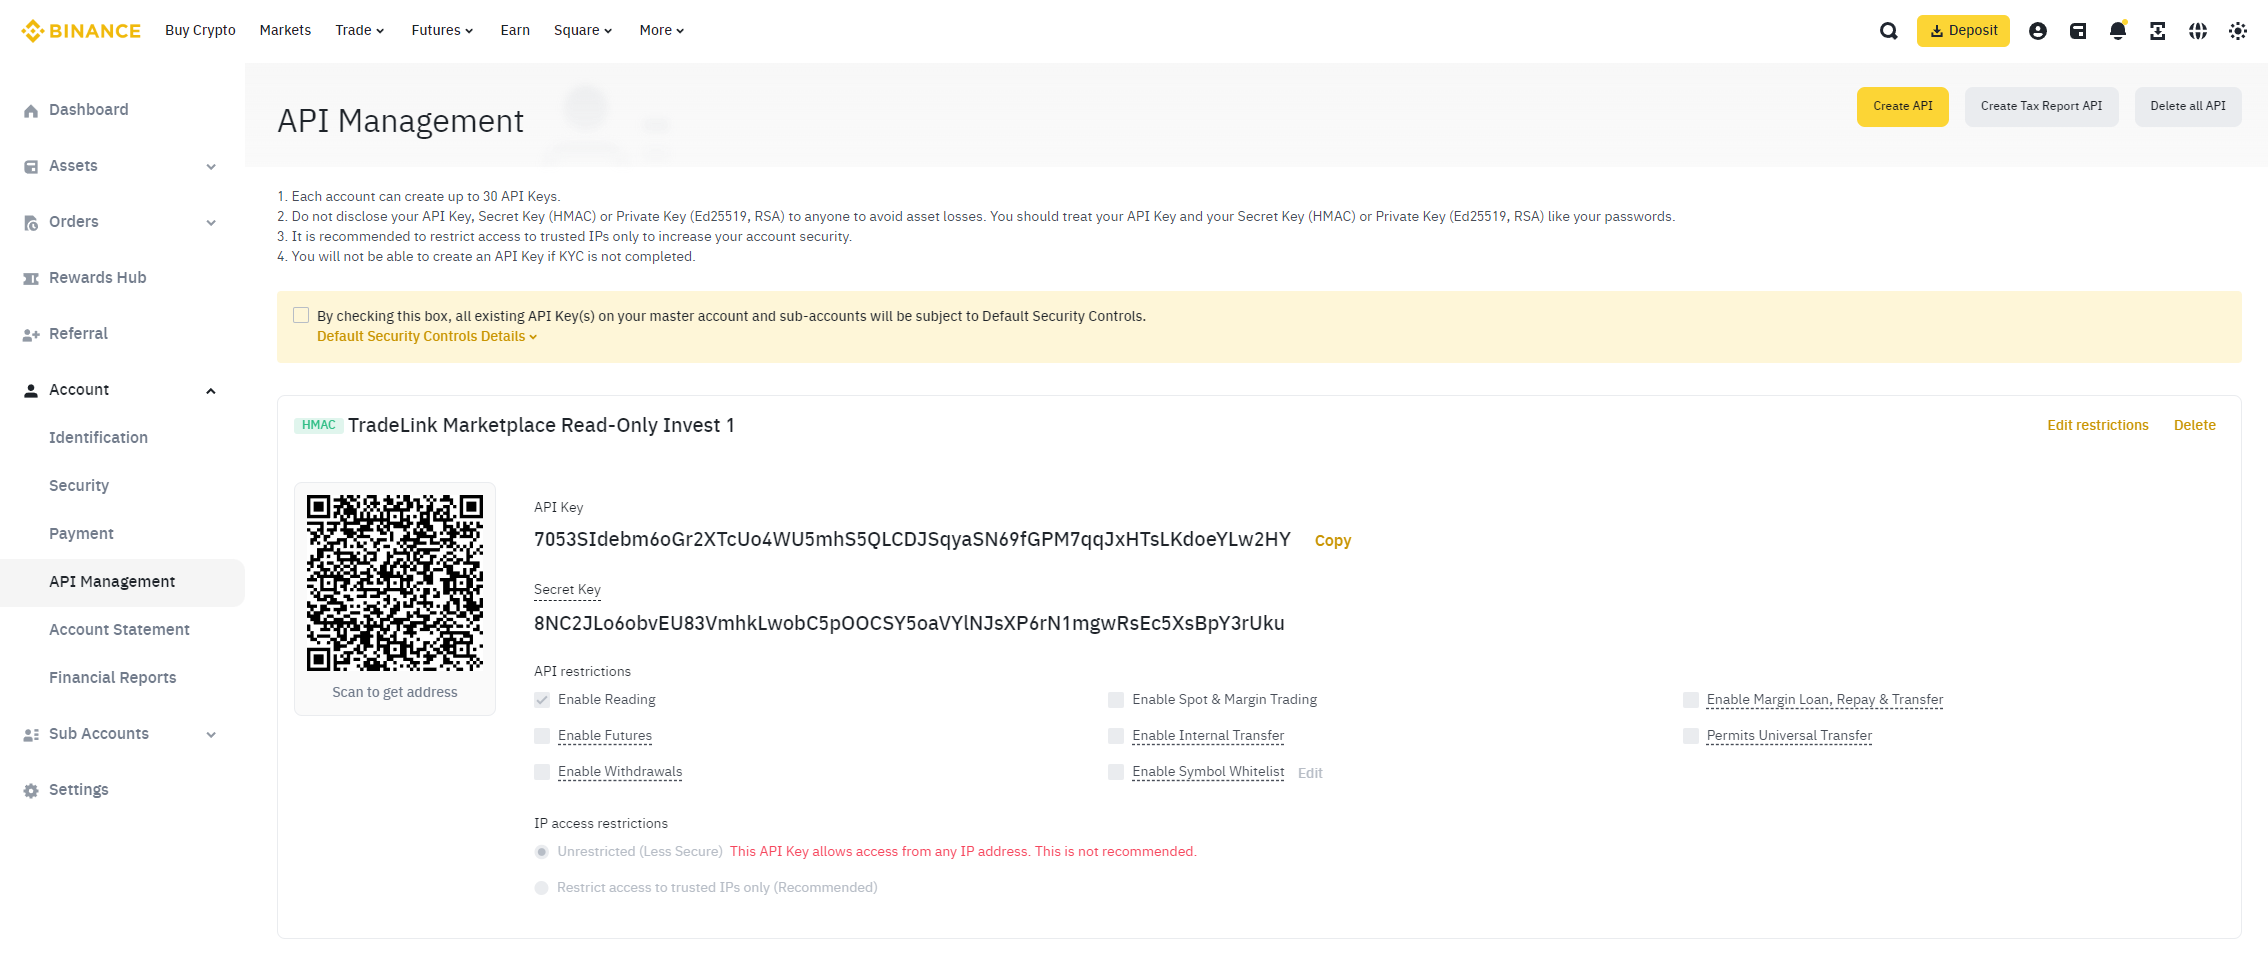
It’s important to note that all keys are created by default as Read-Only without IP restrictions. This is exactly what we need for TradeLink Marketplace: a Read-Only API key without any other permissions, or any IP restrictions.
After creating the API, do not close the page until you are done adding it to the TradeLink, because it will not be shown again. For security reasons, keep in mind that the key cannot be shared with anyone. If you ever forget the Secret Key, we won’t be able to recover it. The only solution is to delete the API and create a new one, which comes with some complications of changing the key on the TradeLink platform.
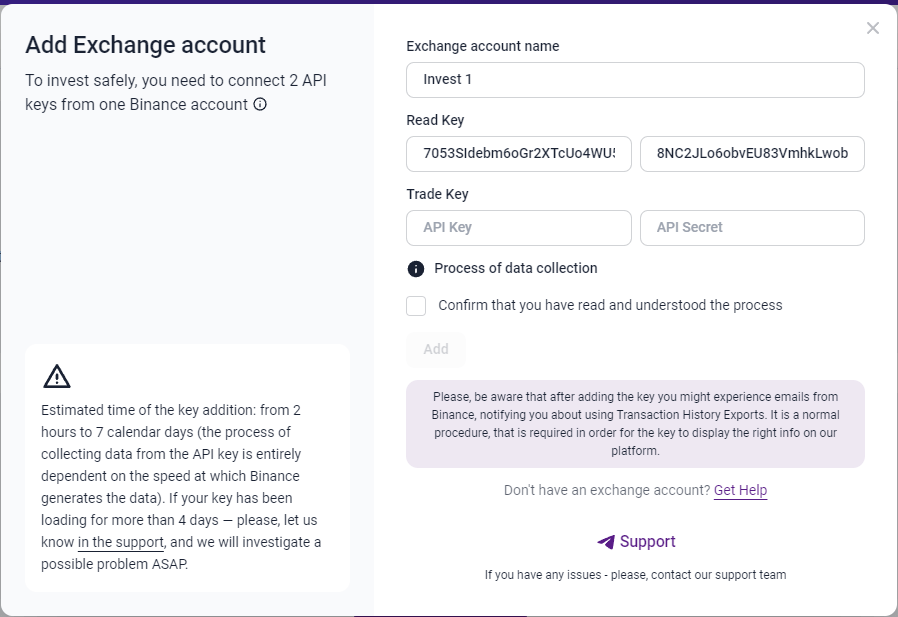
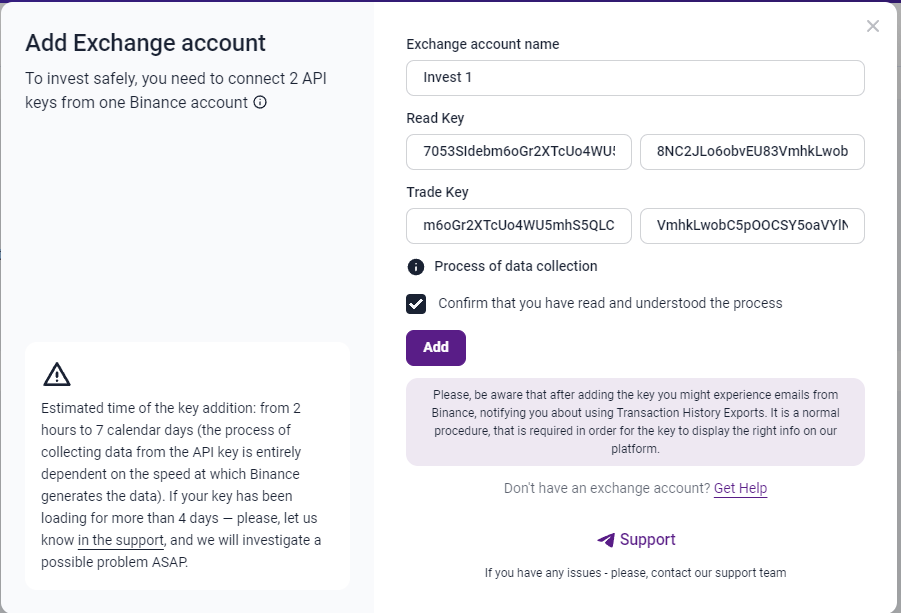
6. The rest is easy: go to the Marketplace Dashboard, click “Add key”, and insert your Read-Only API key in the required field. Keep in mind: your API key consists of 2 separate values: Public Key, and Secret Key. Both of them must be inserted into the required fields.
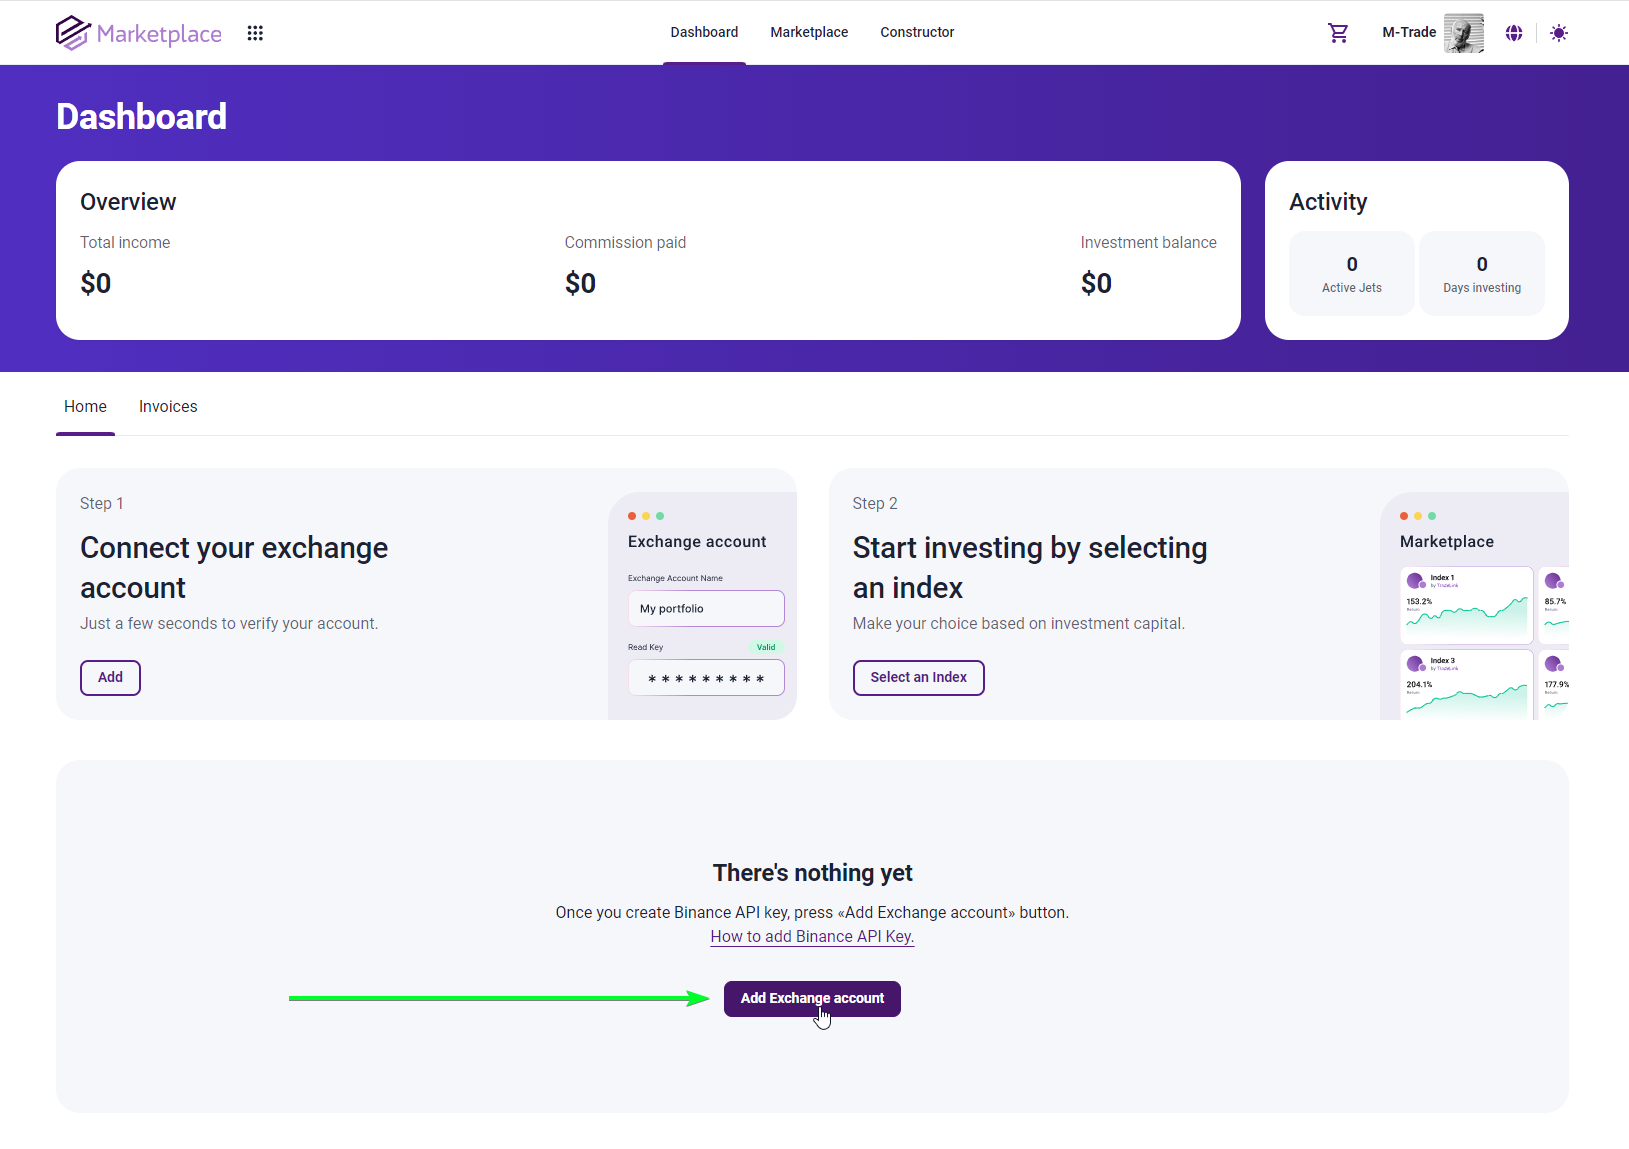
And congrats! The first part of connecting the Exchange account to the Marketplace is completed.
How to create a trade API key for TradeLink Marketplace?
The process is very similar to the read-only key, with slight differences in the end.
1. On the API keys management page, click the “Create API” button
2. The modal window will pop up, where you will be given a choice for the type of generated key. Please, select “System Generated”
3. Select a name for your key. We recommend naming your keys with easy-to-understand logic in mind, to understand the service you provided this key in the future
4. Confirm key creation by entering the 2-factor auth code
5. Congratulations! You’ve created your trade key, even tho right now it doesn’t have the required permissions to trade. Let’s fix it in the next step.
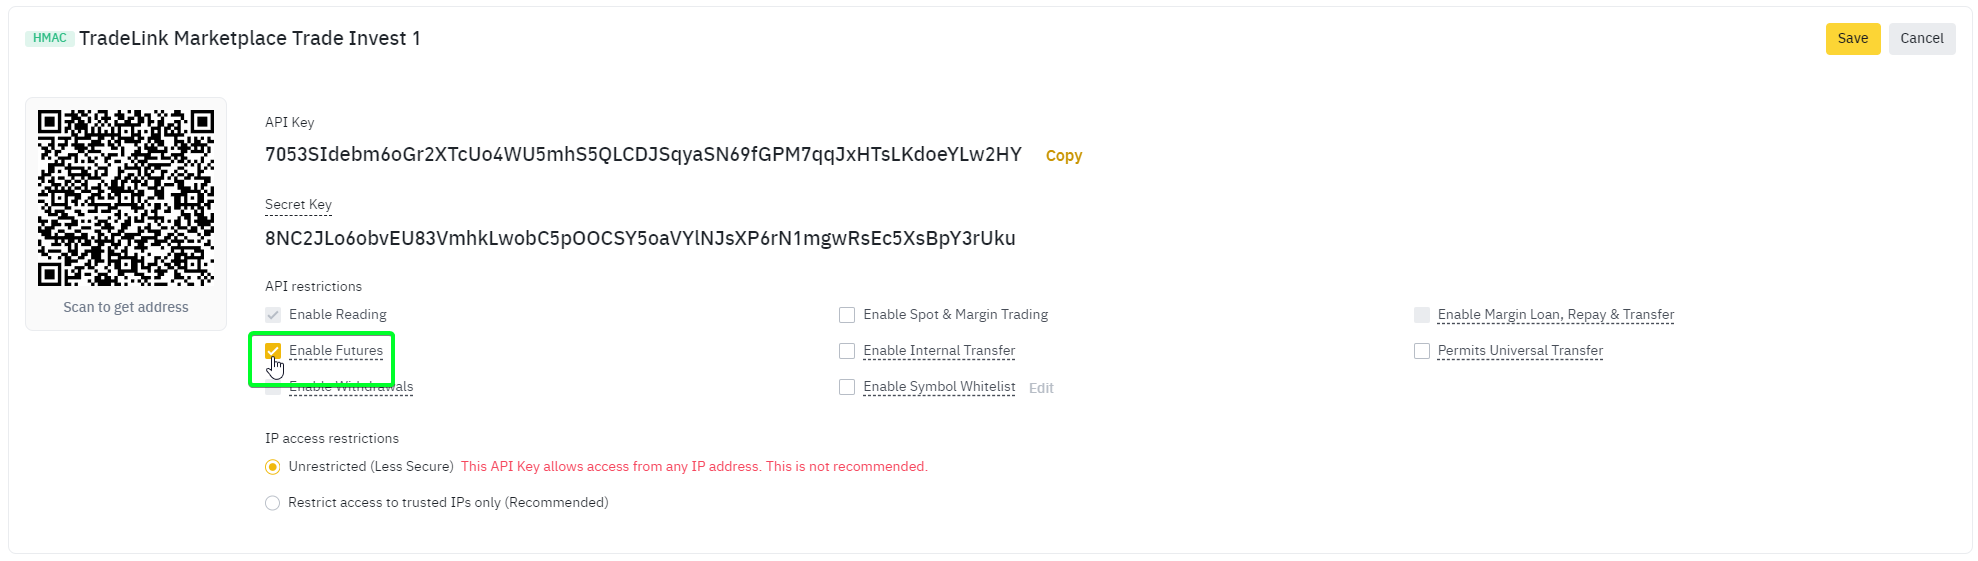
6. For Trade Key, we must enable the only permission of “Enable futures”. To do this, we need to click the “Edit restrictions” button

7. Please, enable the “Enable futures” checkbox.
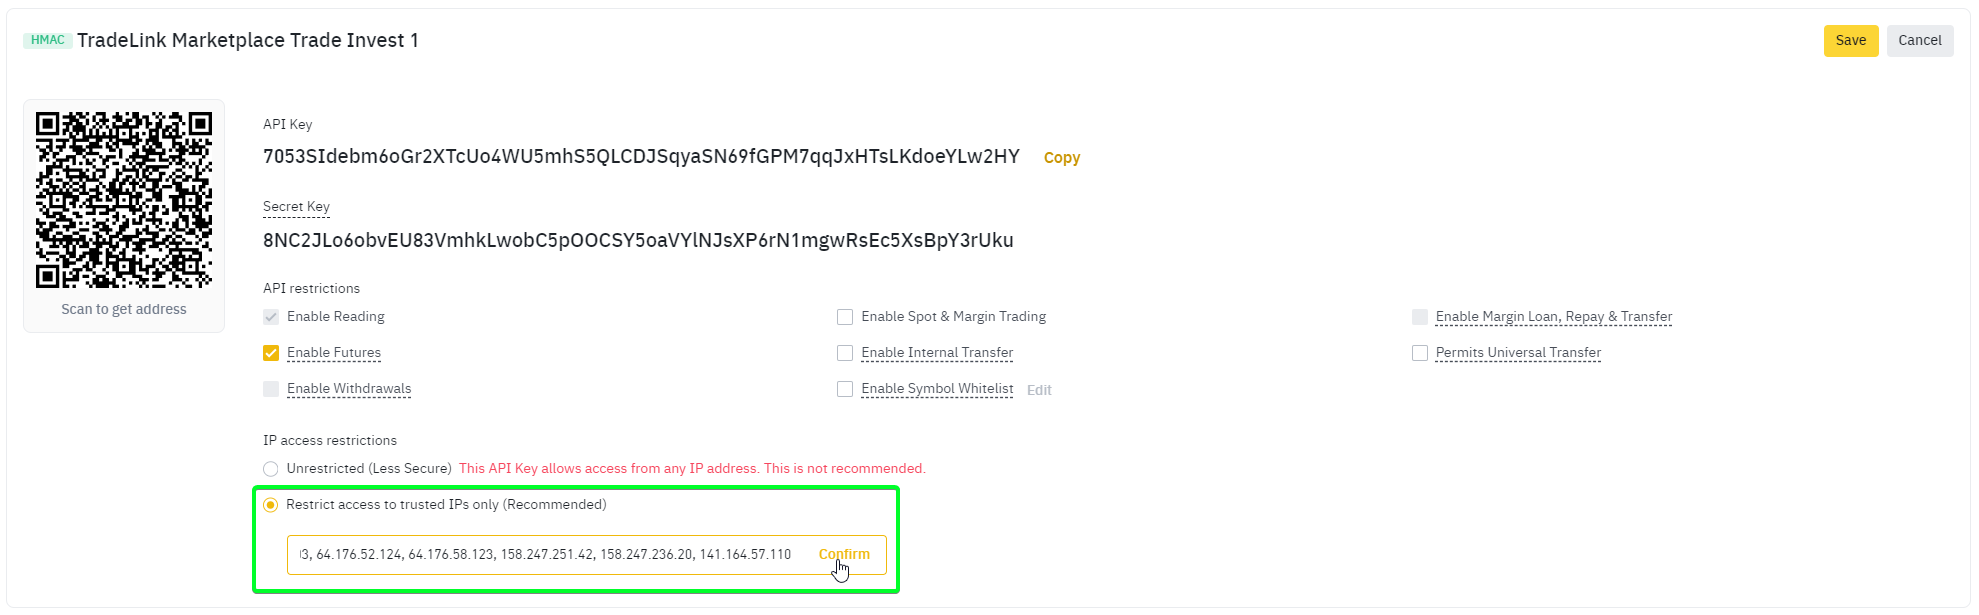
8. This point is up to you, but we strongly recommend you enable “IP access restrictions” for your Trade API key. Our marketplace fully supports this feature, which allows you to greatly improve the safety of your account. You can get actual IPs for whitelisting in the API key addition form on the marketplace.
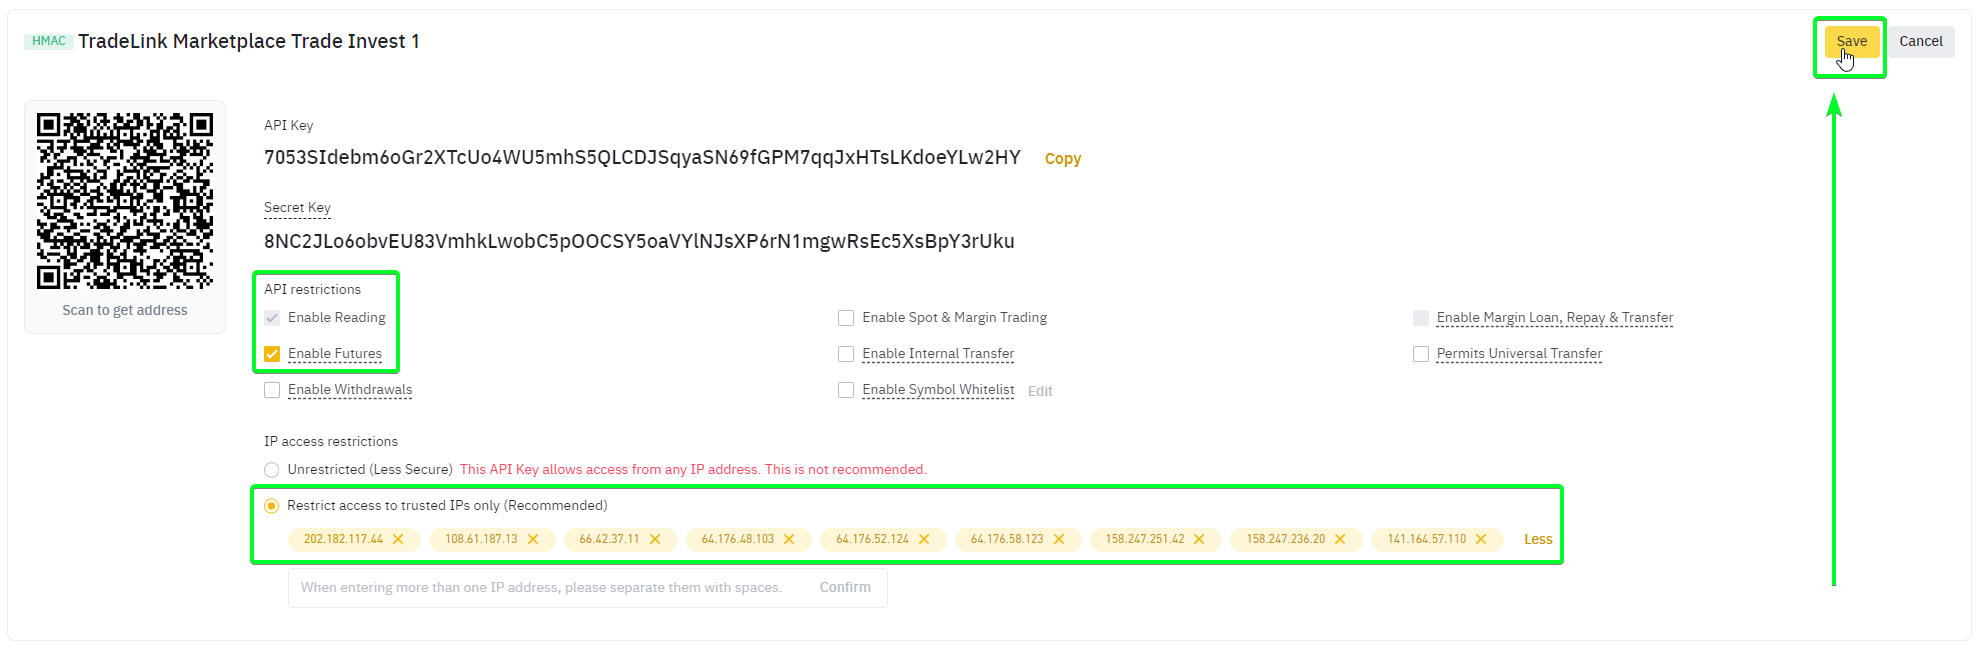
9. Check that your API key has checkboxes only in the “Read-Only”, and “Allow Futures” options, optionally has an IP whitelist with a written IP list from the form on the TradeLink Marketplace, and click the “Save” button
10. Congratulations! Your trade key is fully ready to use now! You can simply copy your new Public and Secret Trade API key values
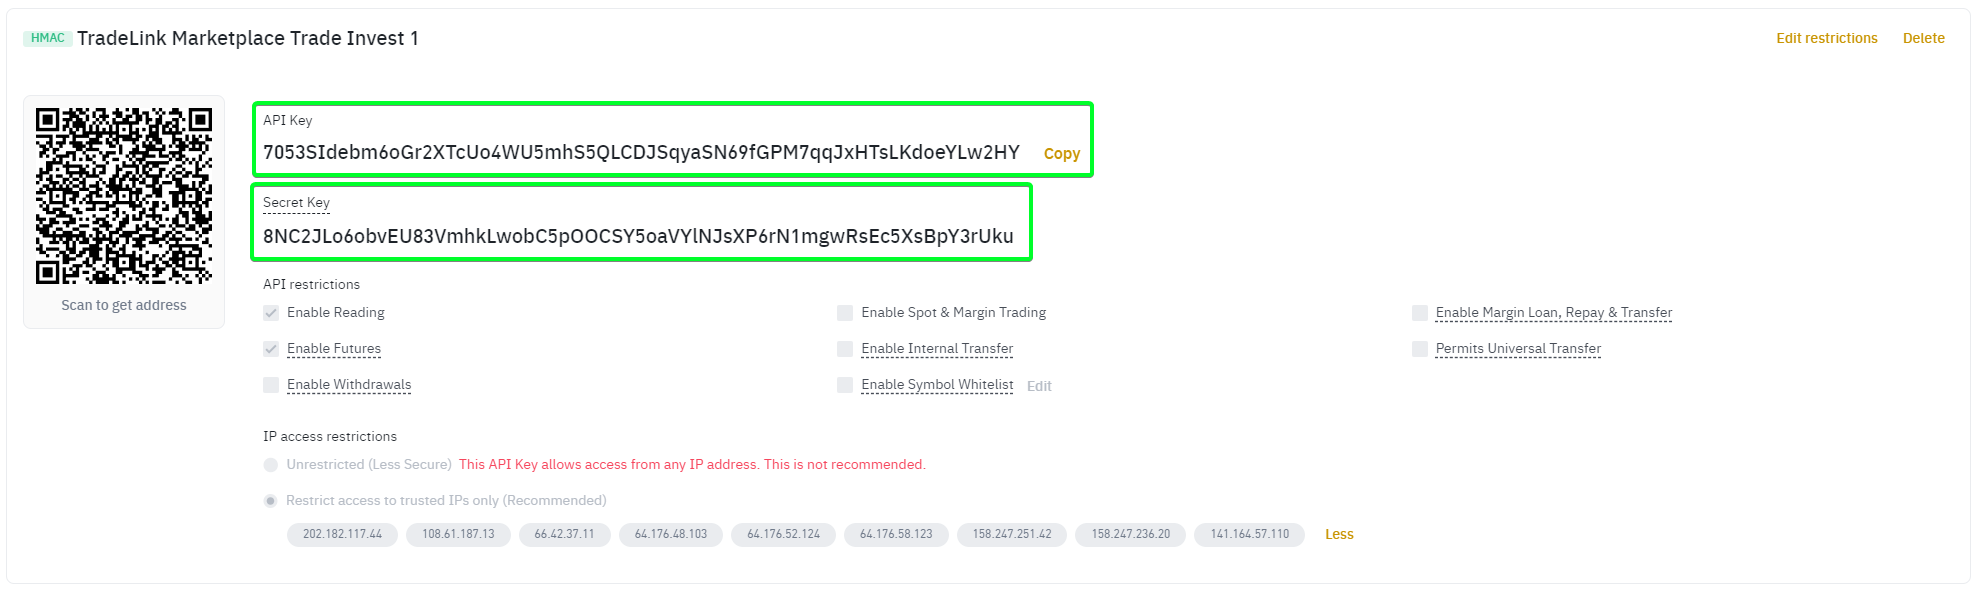
11. Let’s finally add your API exchange account to the TradeLink Marketplace, by simply copying your public and secret key to the TradeLink form
Congratulations! You were able to create API keys to link your account to the TradeLink Marketplace!
Hopefully, this article answers your question. If not – we will be more than happy to support you by the link in the “Add key” modal window.