How to add a key to the Passport
The process is very simple, takes no more than 10 minutes, and requires nothing more than a Binance account and email.
* Security Reminder: Before creating the API key on Binance, you must enable two-factor verification.
** Service Peculiarity: Your API key will count as invalid as long as it has no historical futures trades. You need to have at least 1 action (deposit, trade, or withdrawal) on the Binance futures account before adding your API key to the TradeLink Passport
*** Before trying to create an API key, you need to have at least $1 deposited to the Binance futures wallet.
Contents
- How to add Binance API key?
- How to add ByBit API key?
- How to add the OKX Exchange API key to TradeLink Passport
How to add Binance API key?
How do I create an API key on Binance?
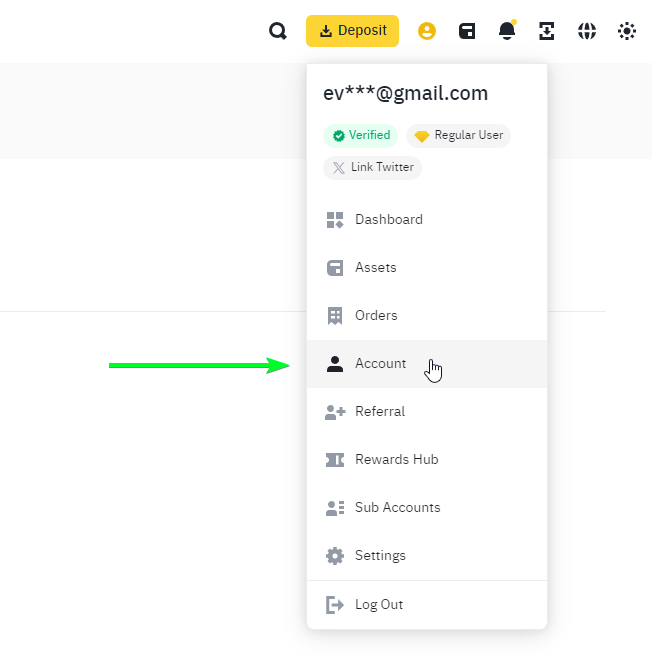
1. After logging in to your Binance account, go to the “Account” tab in the account drop-down menu. Or simply use this link, and skip the next step
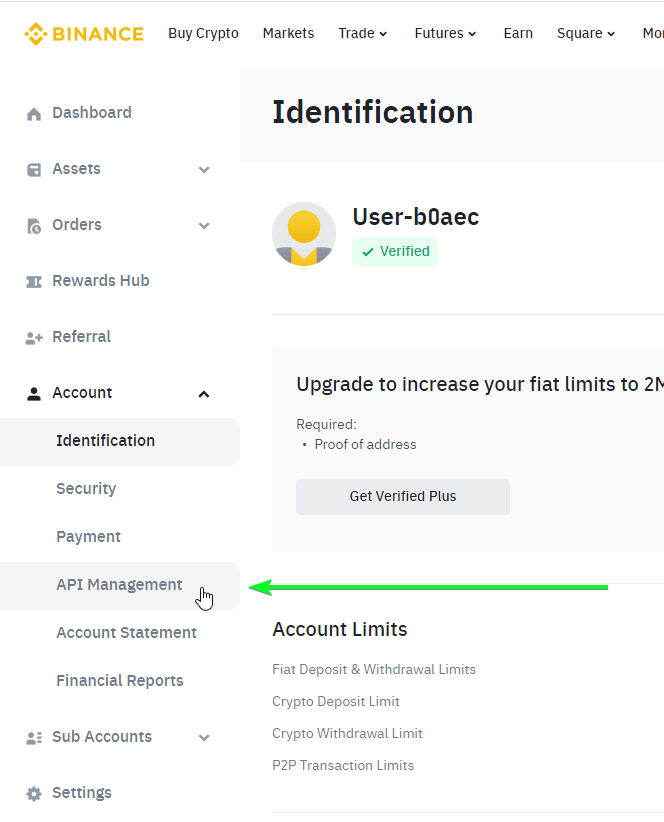
2. Go to the “API management” tab in the left menu of the “Account” page
3. The page you were transferred to should look something like this:
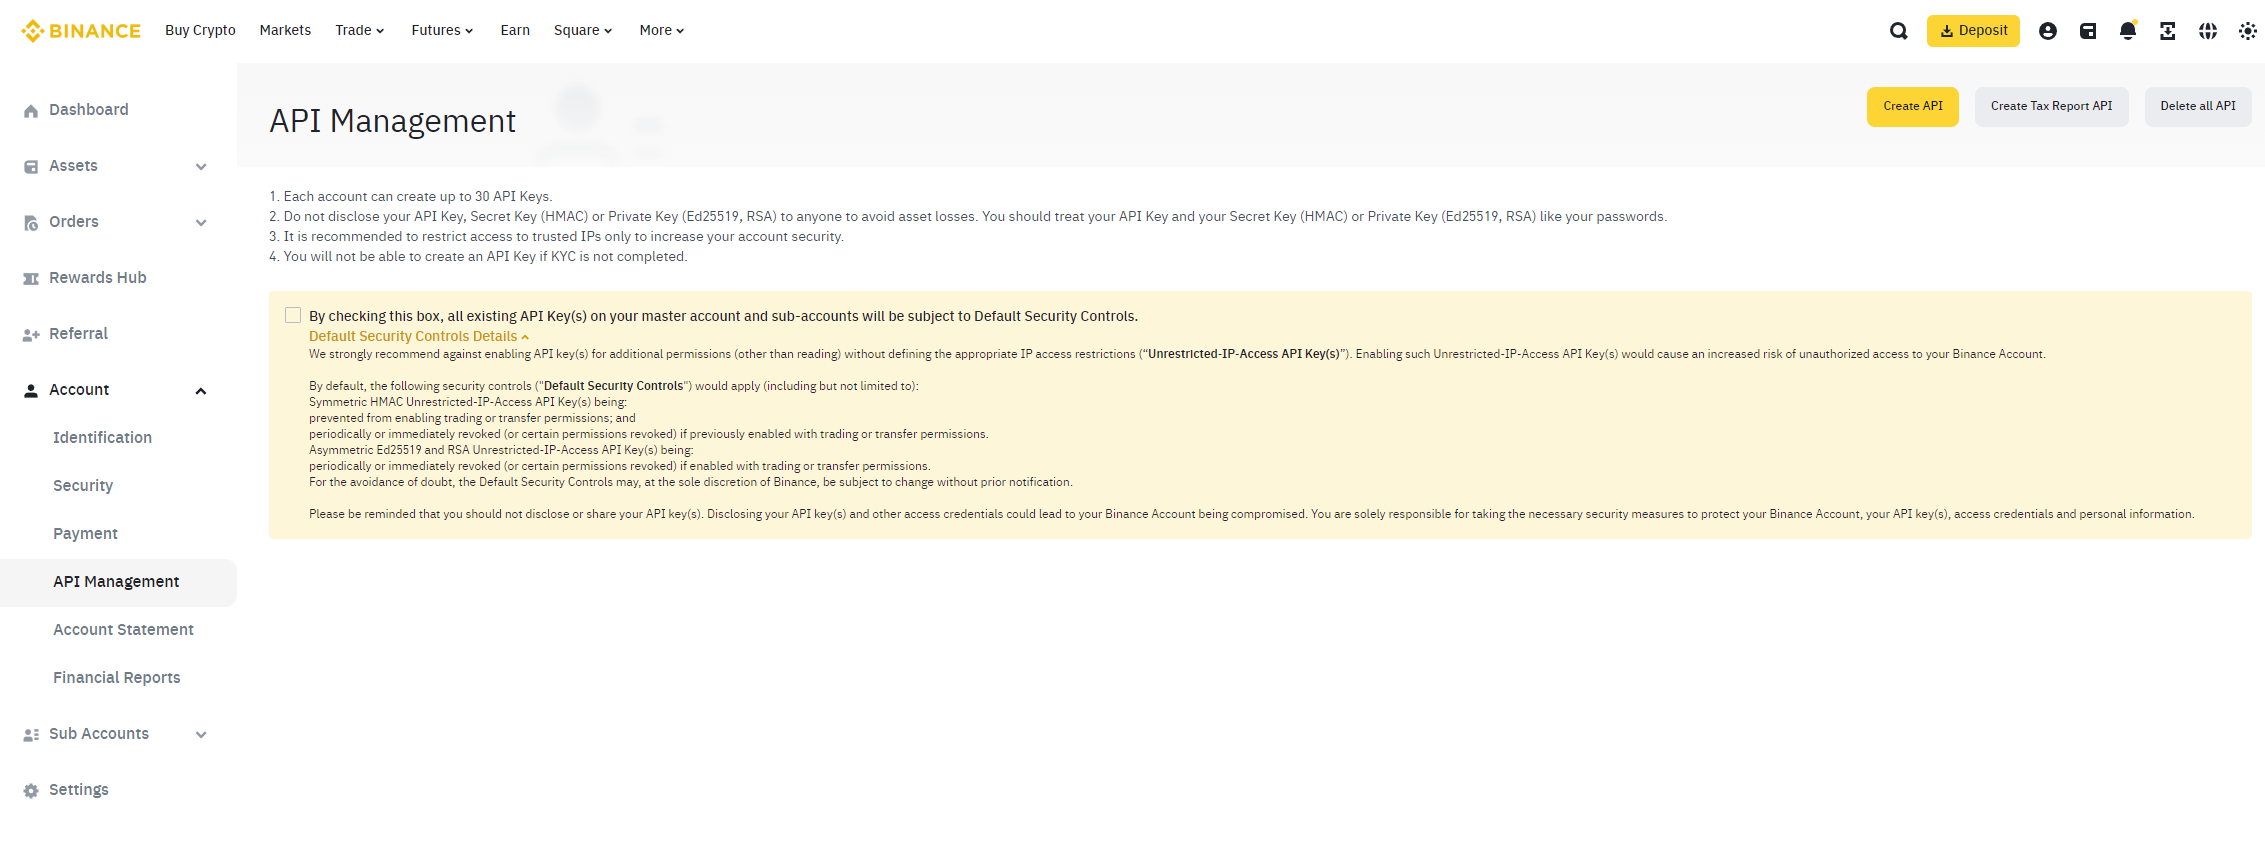
4. Before going further, let’s resolve a very important question that will be crucial for your API key stability
Optional API key security settings by Binance
As you can see, there is a very big orange element located on the page. Let’s investigate a bit further what this little checkbox has to do with all of your API keys.

This checkmark is on by default and allows Binance to restrict your API keys at any time without your notification. We had several cases where Binance removed trading permissions for the API key, only to further understand that the user hadn’t turned off this checkmark, which made it possible for Binance to do actions that were not requested by the user.
We prefer that users turn this checkmark off for easier work with API keys.
How to create a read-only API key for TradeLink Passport?
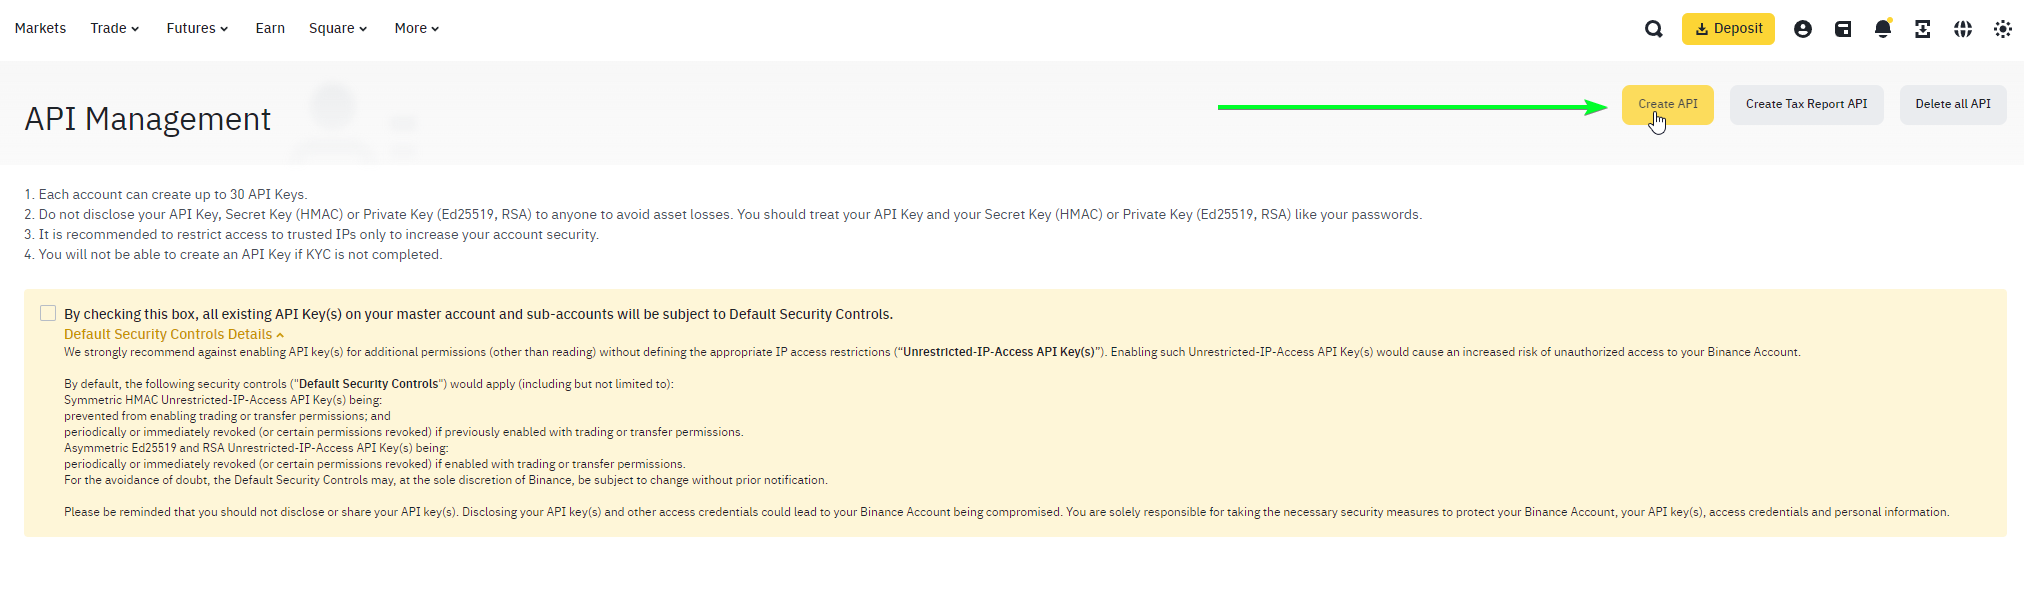
1. On the API keys management page, click the “Create API” button
2. The modal window will pop up, where you will be given a choice for the type of generated key. Please, select “System Generated”
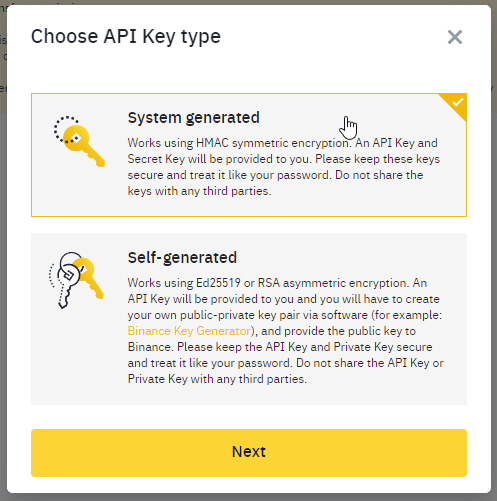
3. Select a name for your key. We recommend naming your keys with easy-to-understand logic in mind, to understand the service you provided this key in the future

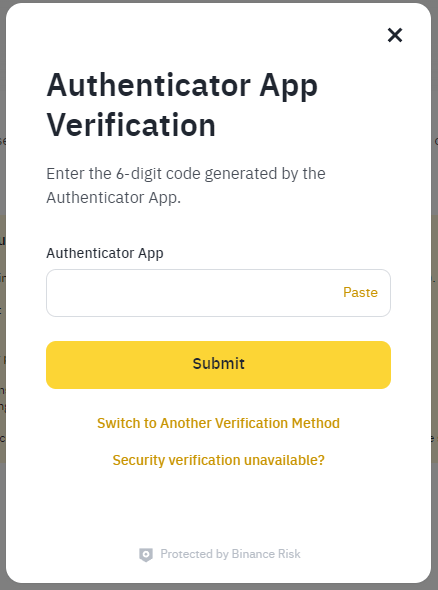
4. Confirm key creation by entering the 2-factor auth code
5. Congratulations! You’ve created your read-only API key. Now your page should look something similar to the image below
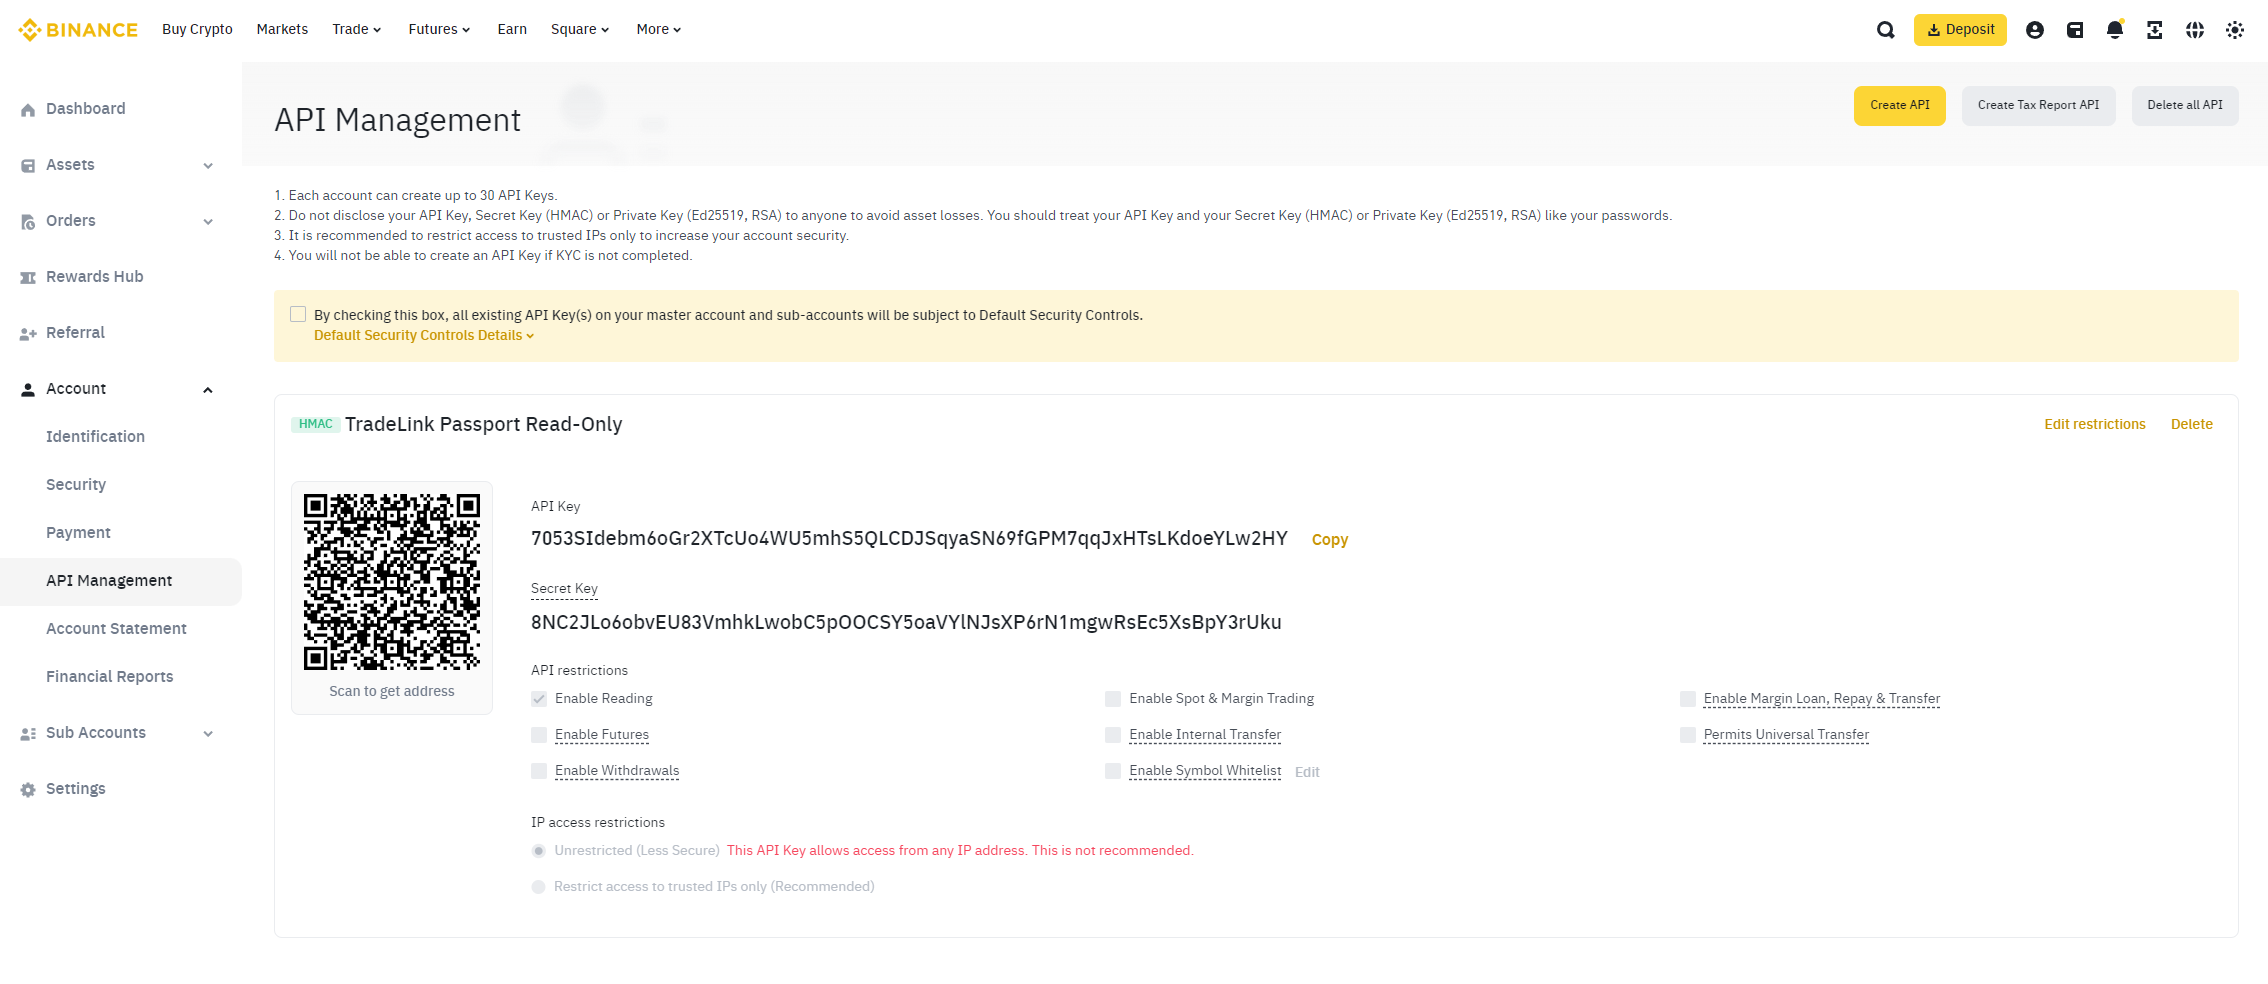
It’s important to note that all keys are created by default as Read-Only without IP restrictions. This is exactly what we need for TradeLink Passport: a Read-Only API key without any other permissions, or any IP restrictions.
After creating the API, do not close the page until you are done adding it to the TradeLink, because it will not be shown again. For security reasons, keep in mind that the key cannot be shared with anyone. If you ever forget the Secret Key, we won’t be able to recover it. The only solution is to delete the API and create a new one, which comes with some complications of changing the key on the TradeLink platform.
6. The rest is easy: go to the Passport Dashboard, click “Add key”, and insert your Read-Only API key in the required field. Keep in mind: your API key consists of 2 separate values: Public Key, and Secret Key. Both of them must be inserted into the required fields.
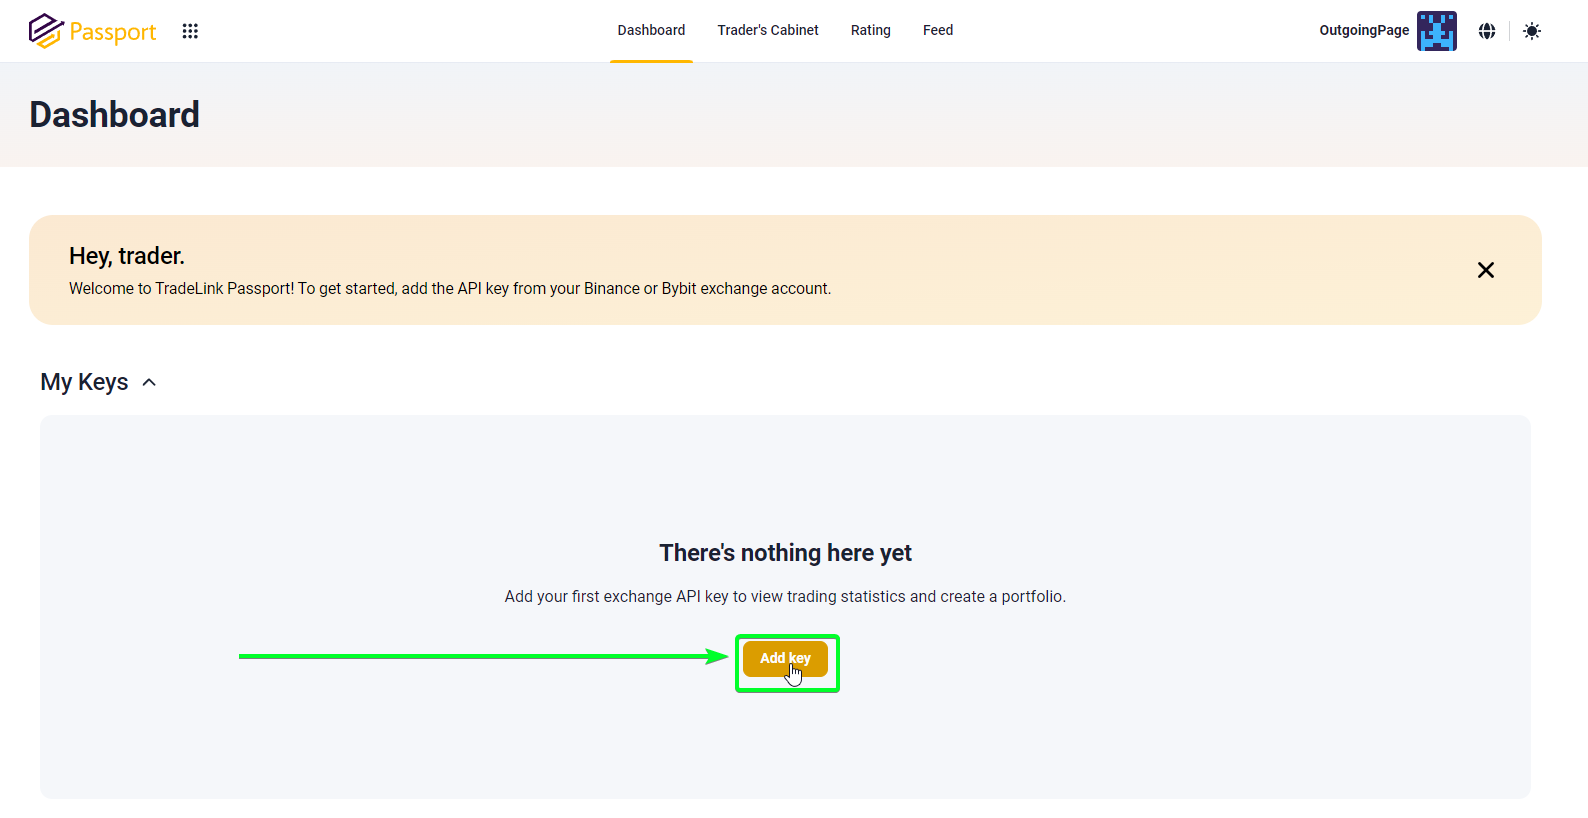
And congrats! The first part of connecting the Exchange account to the Passport is completed.
How to add ByBit API key?
How do I create ByBit API key for TradeLink?
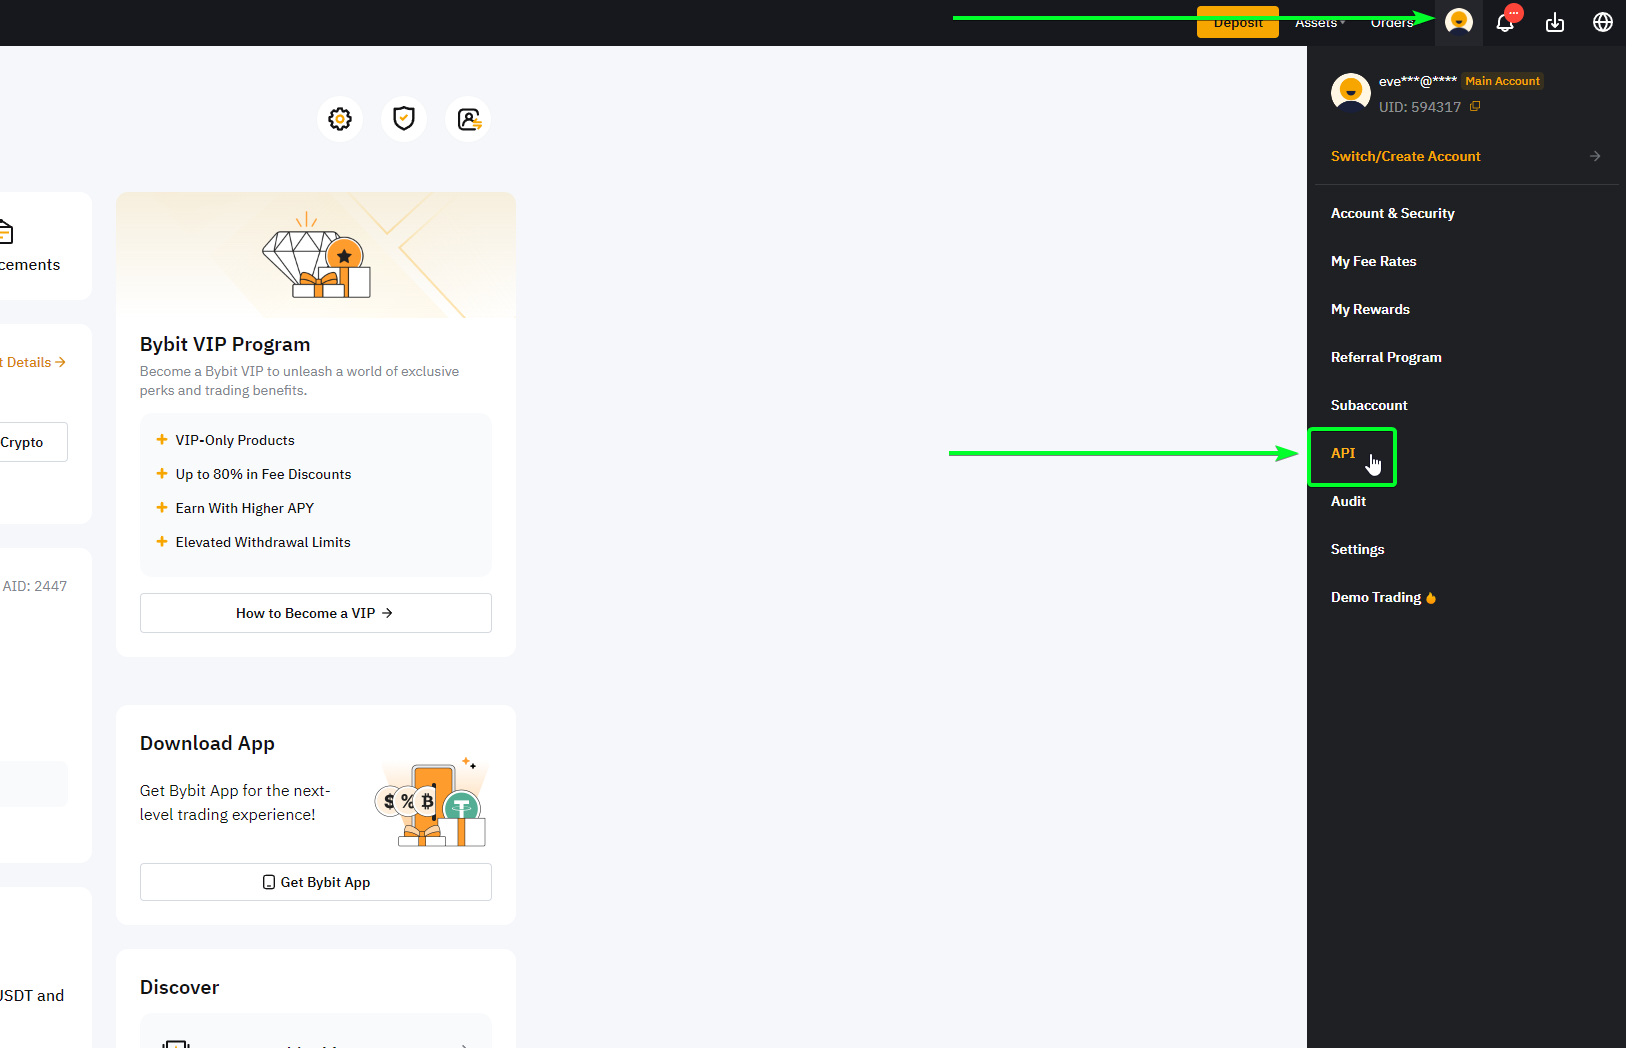
After logging in to your ByBit account, go to the “API” tab in the account drop-down menu. Or simply use this link, and go to the next step
How to create a read-only API key for TradeLink Passport?
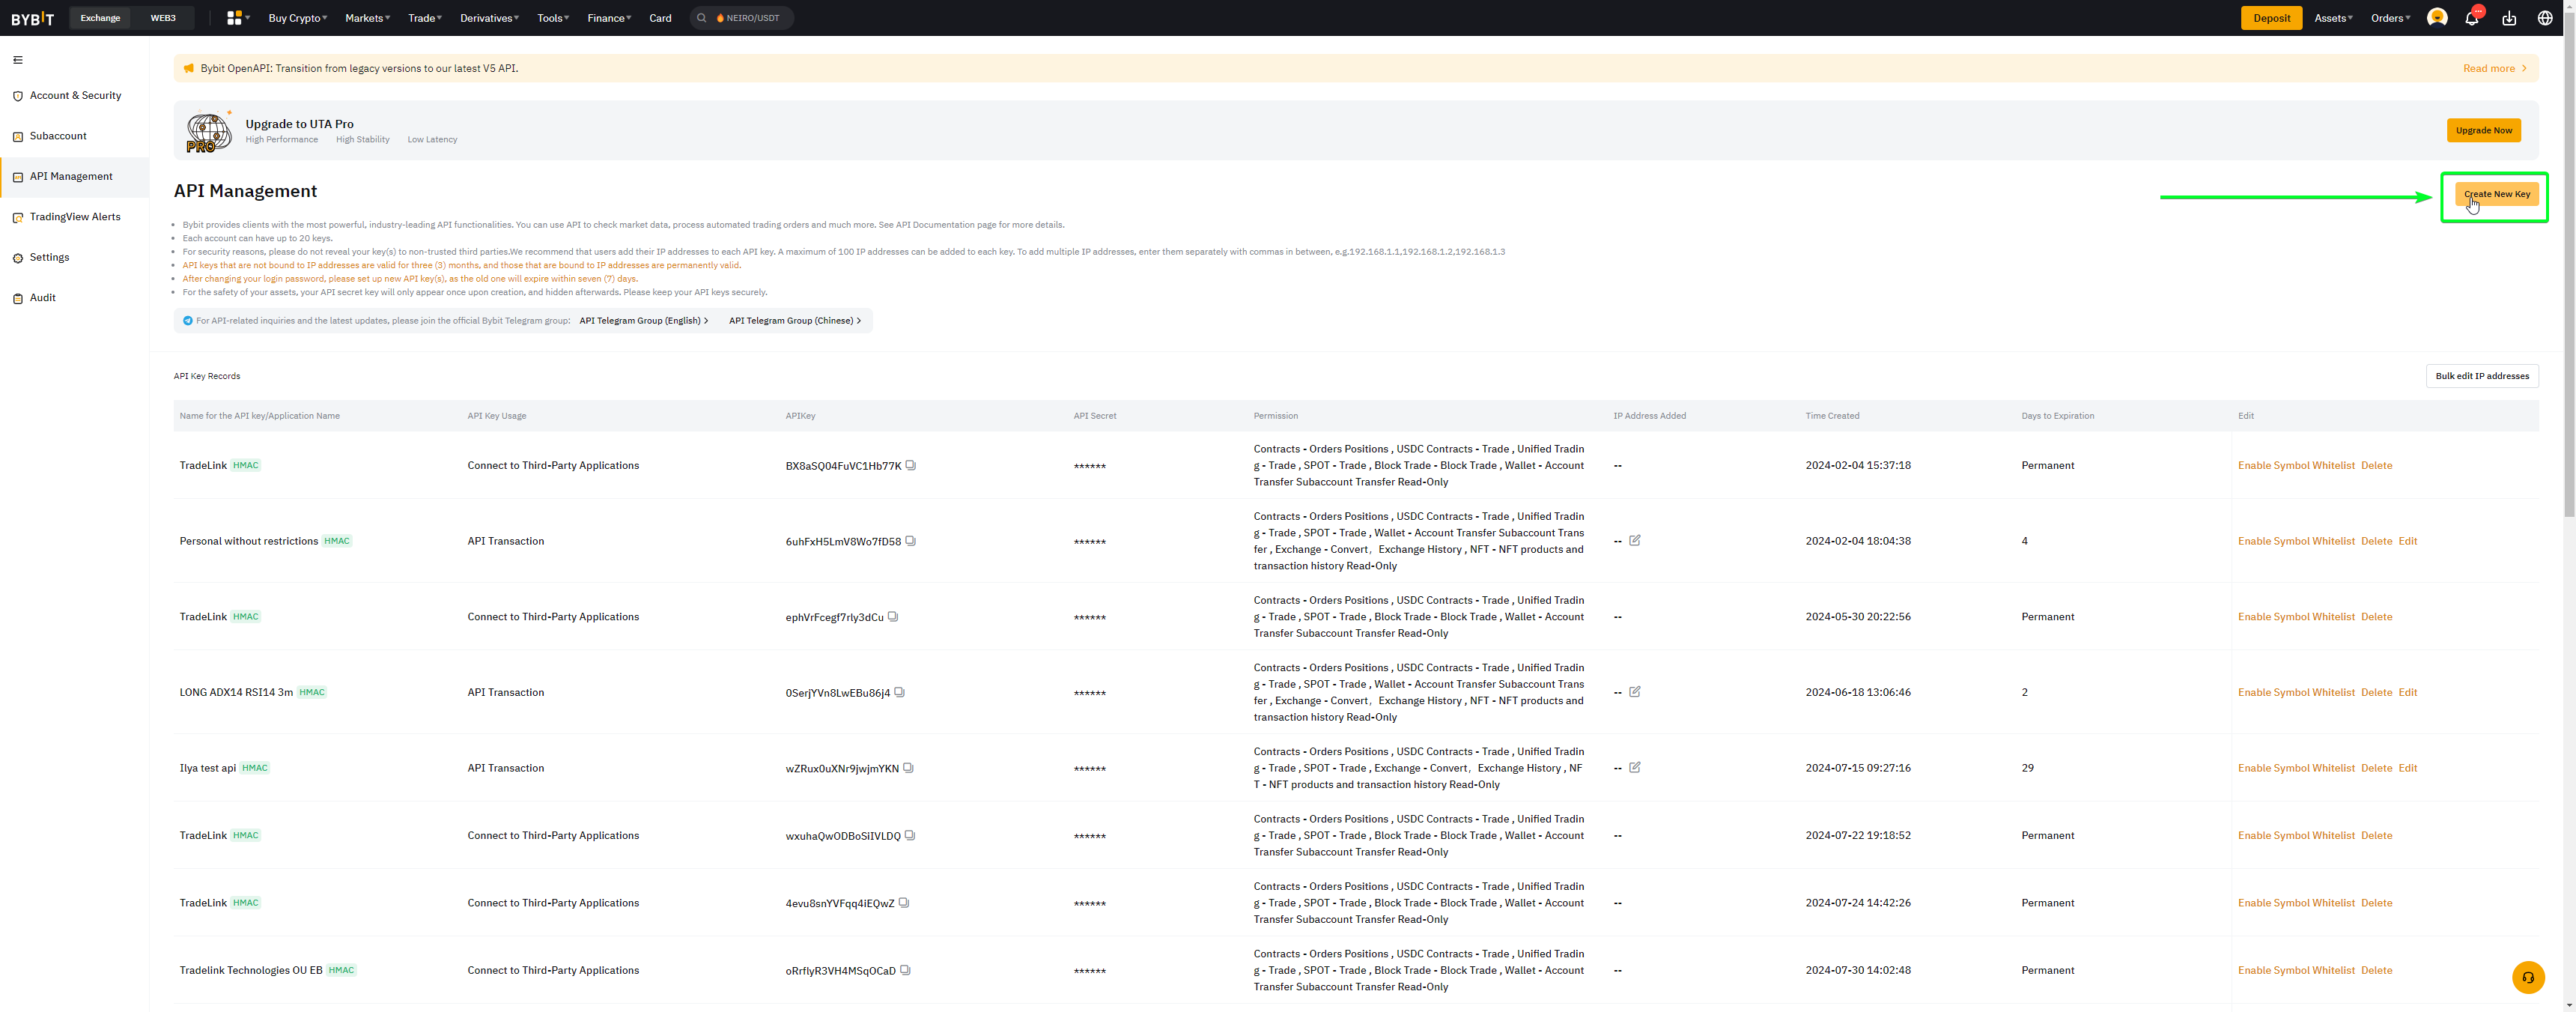
1. On the API keys management page, click the “Create API” button
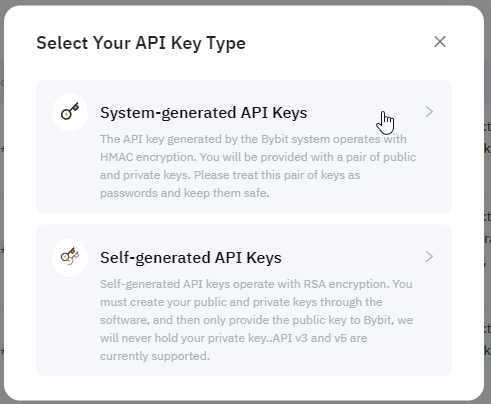
2. The modal window will pop up, where you will be given a choice for the type of generated key. Please, select “System Generated”
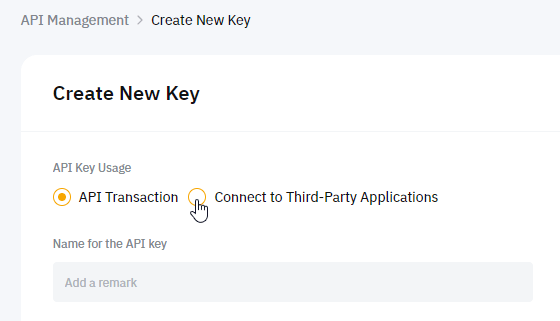
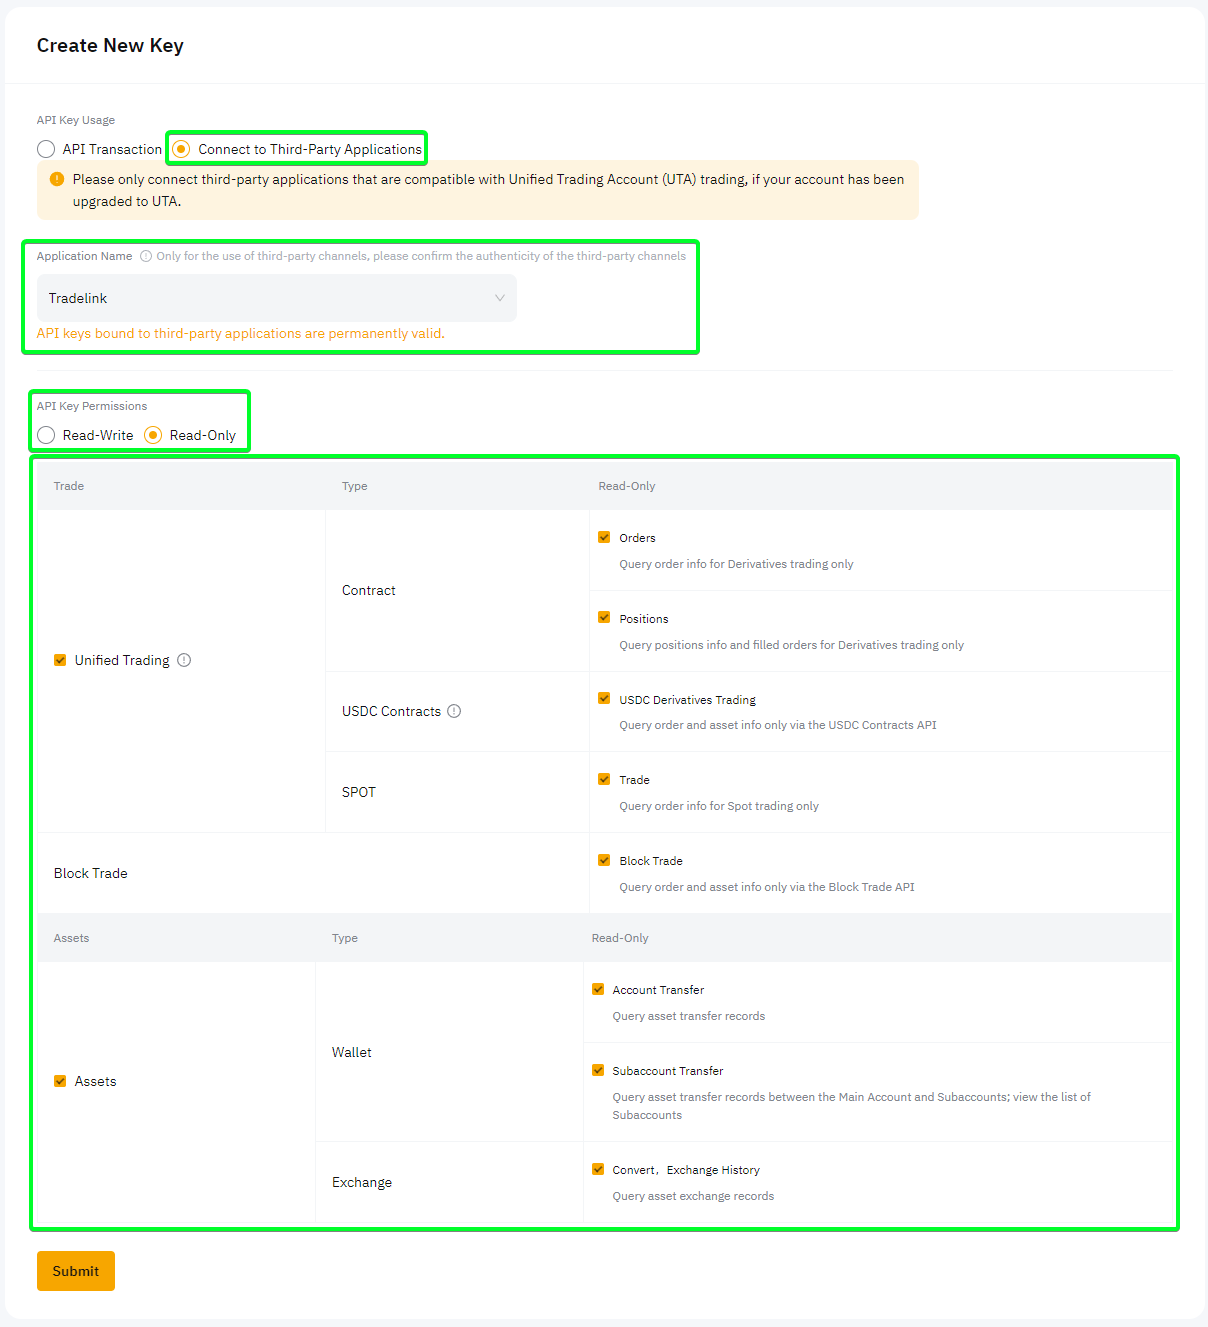
3. You’ll be redirected to the API key creation page, that can also be accessed using this url. In there, please, select “Connect to Third-Party Applications” option
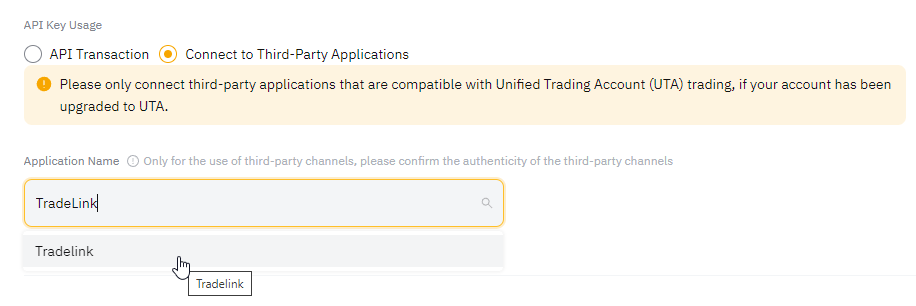
4. In the application list, please, select “TradeLink”
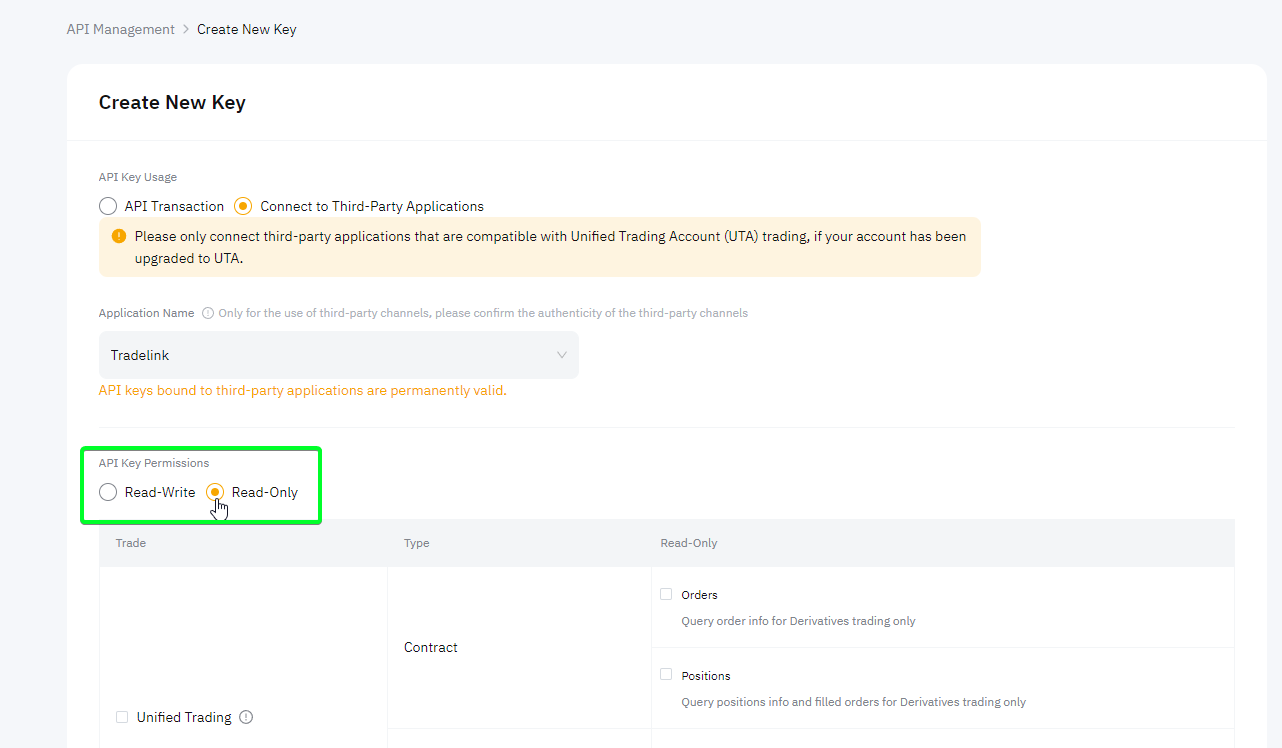
5. Make sure you are creating “Read-Only” API key, by selecting the option from the screenshot below
6. In order for TradeLink to successfully download all the information from your exchange account, API key has to have no read restrictions. In order to do so, please, select all the permissions checkmarks (as this API key is Read-Only, TradeLink still won’t have any ability to neither trade on your account, nor use your funds in any way. The only thing these permissions allow TradeLink to do, is to get historical data).
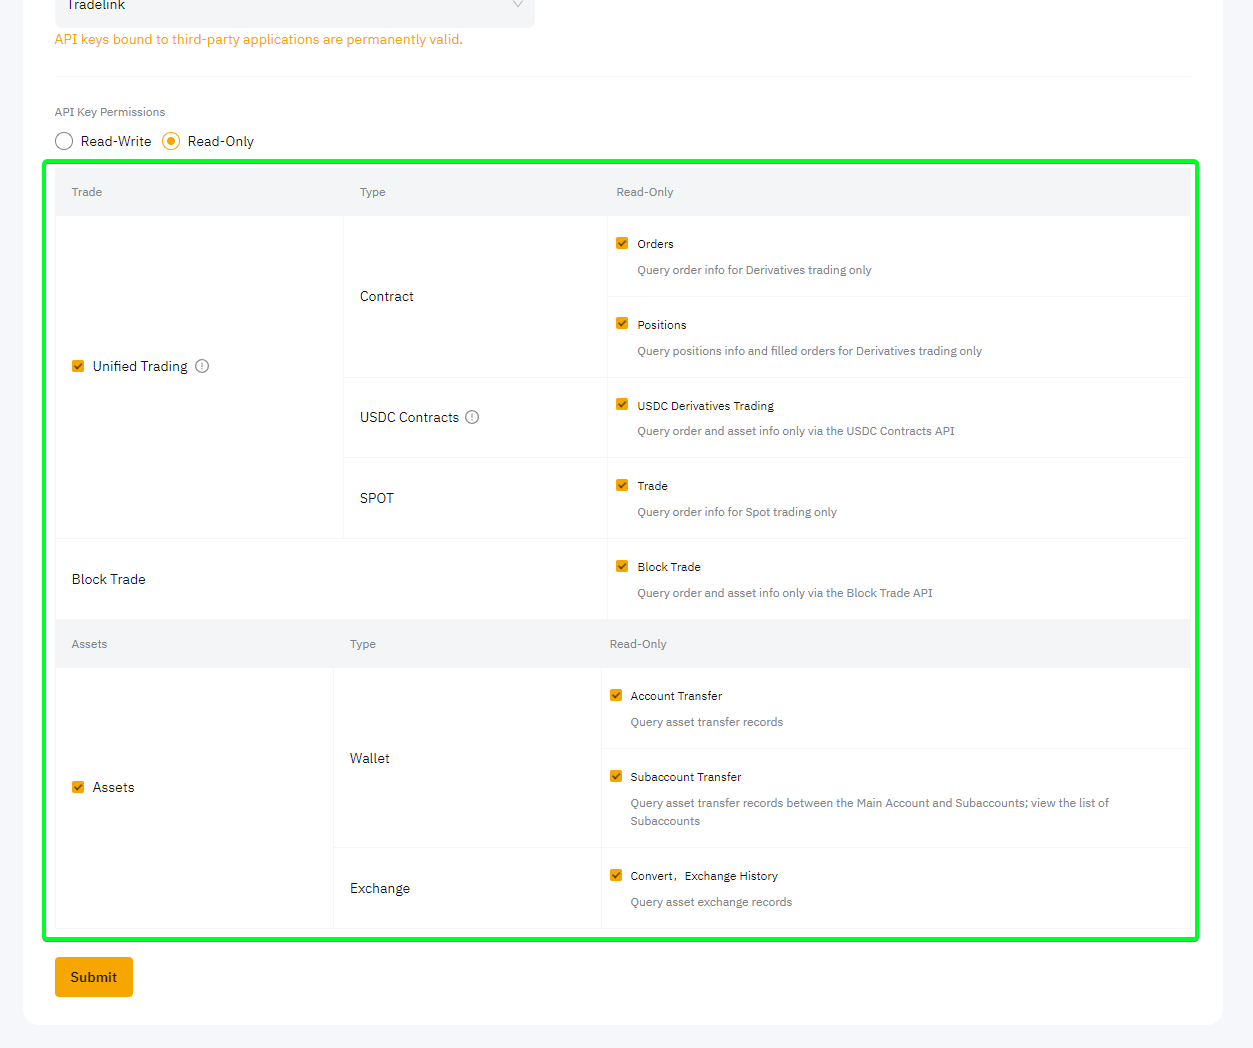
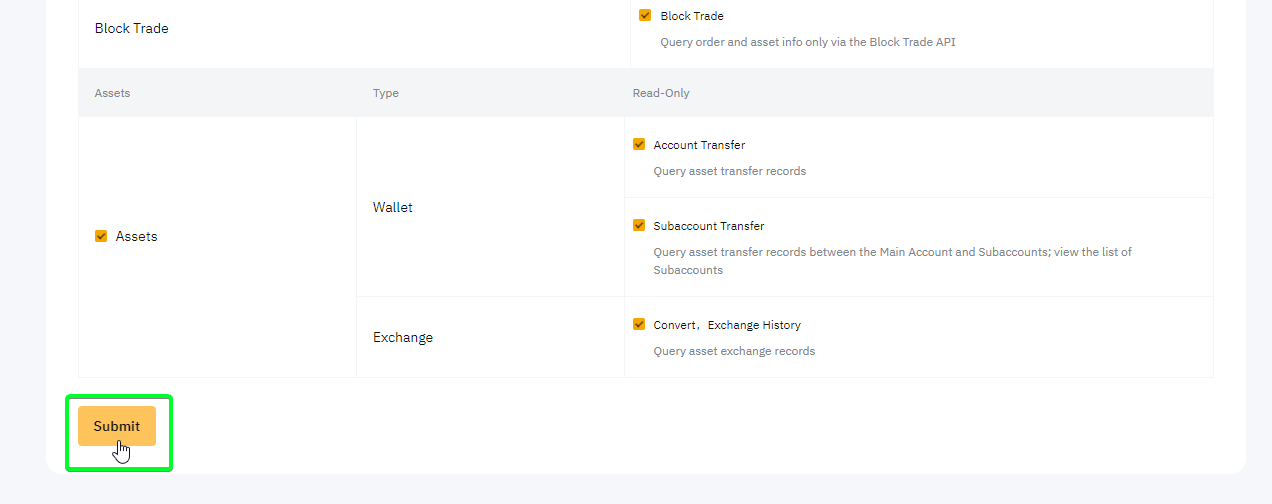
7. Make sure your API key is for TradeLink, is Read-only, and has all permissions enabled, then click the “Save” button
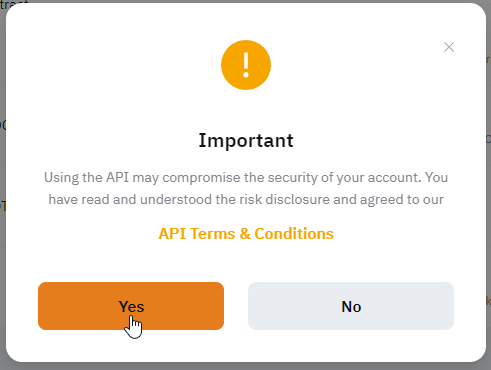
8. ByBit might warn you about the risk, in order to finish API key creation you might want to click “Yes” after reading what ByBit has to say
9. Voilà! You’ve successfully created ByBit API key for TradeLink Passport connection, and are now ready to connect it to the platform.

Key addition to the TradeLink Passport
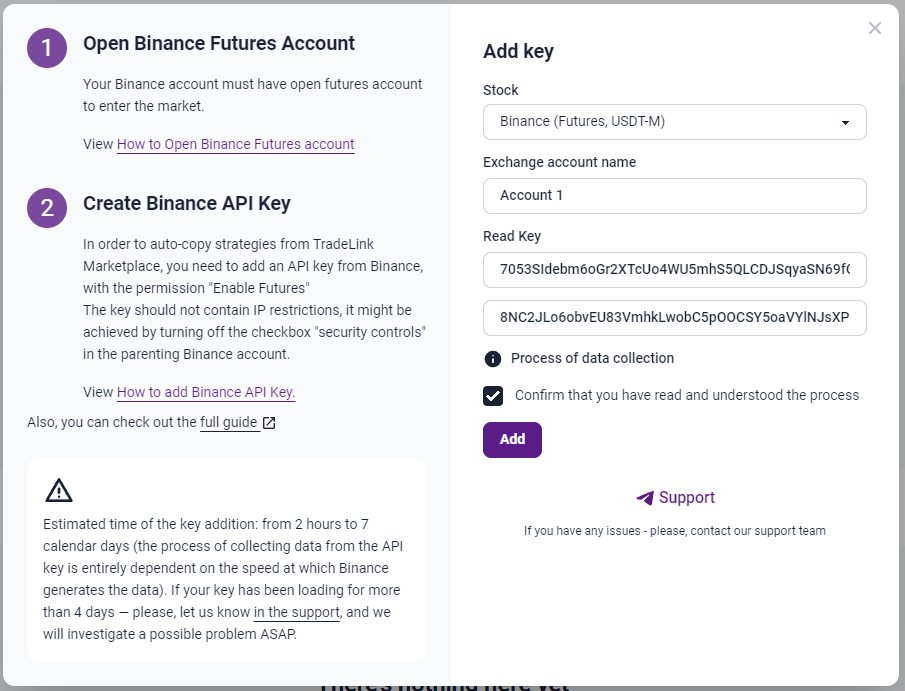
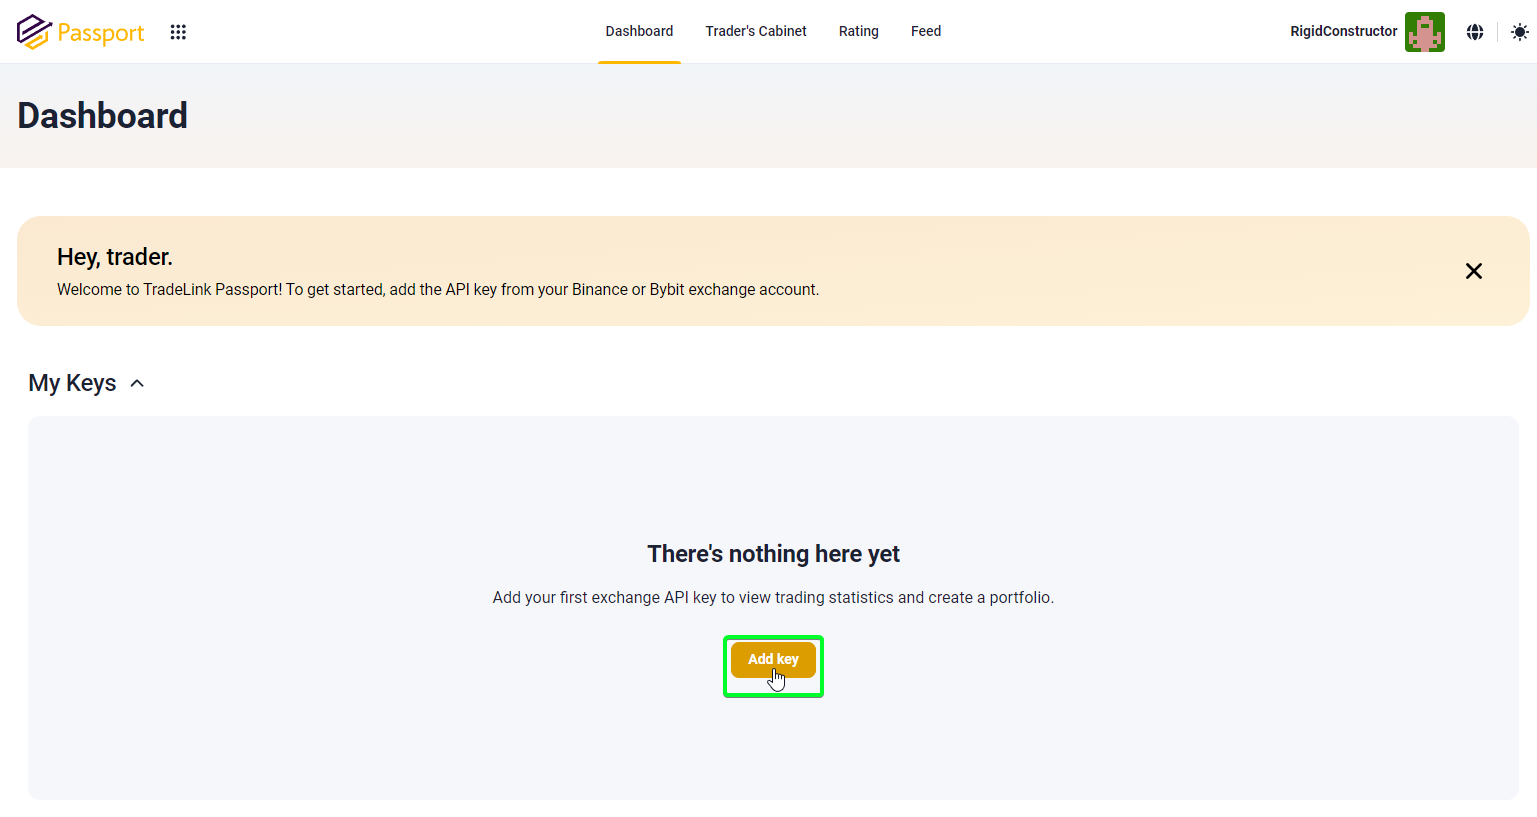
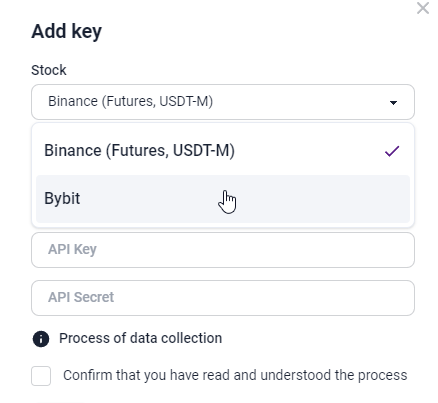
The hard part is over. Now all you need to do, is to simply go to the TradeLink Passport dashboard, and click “Add key” button
In the opened form, select “ByBit” as a stock
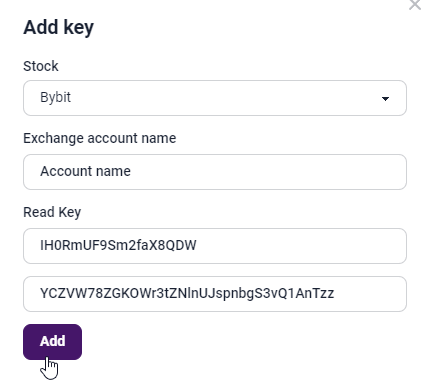
Then, simply copy-paste the read and secret part of your API key from the ByBit exchange, create a name of your API key on TradeLink (it doesn’t need to be the same as on ByBit), and click the “Add” button!
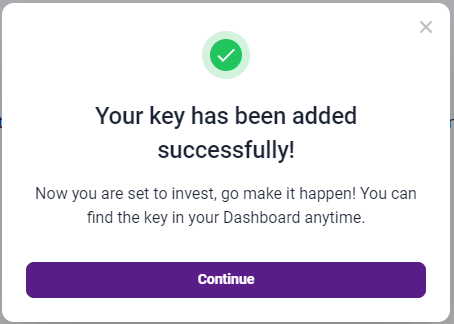
That’s it, you can now successfully use your newly added exchange account.
Hopefully, this article answers your question. If not – we will be more than happy to support you by the link in the “Add key” modal window.
How to add the OKX Exchange API key to TradeLink Passport
Detailed step-by-step guide on how to add an API key from the OKX exchange to TradeLink Passport.
* Your OKX account must have either an open futures account or a futures sub-account with at least one deposit transaction.
** The connected key must have the “Read” option enabled in the category settings.
*** The connected key must not have an IP whitelist enabled.
Creating an API key on the OKX exchange
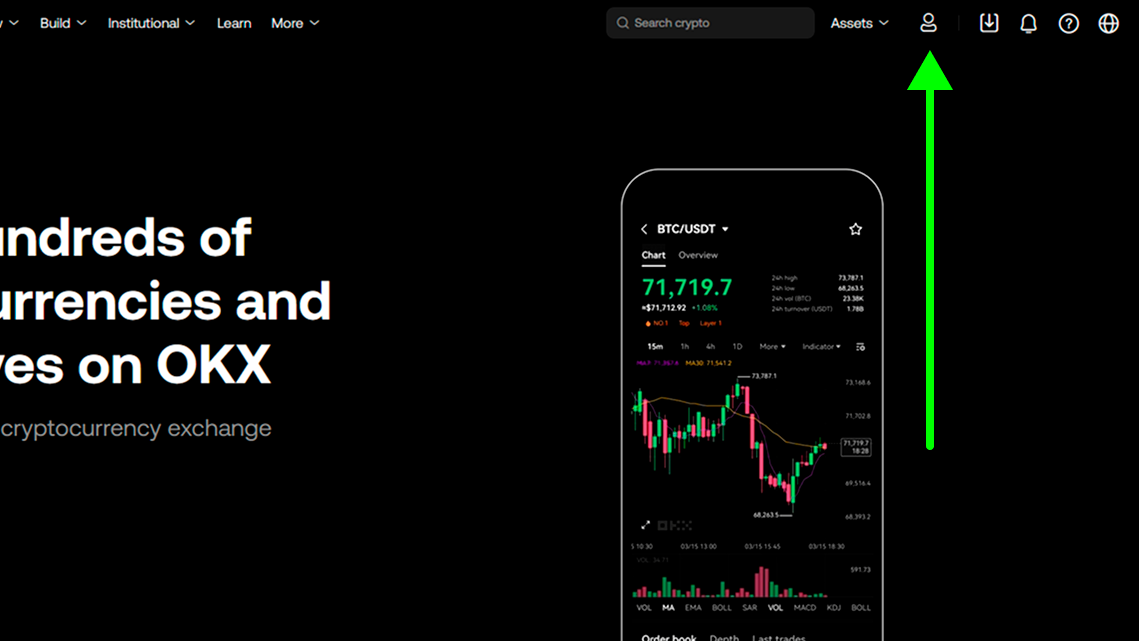
Step 1.
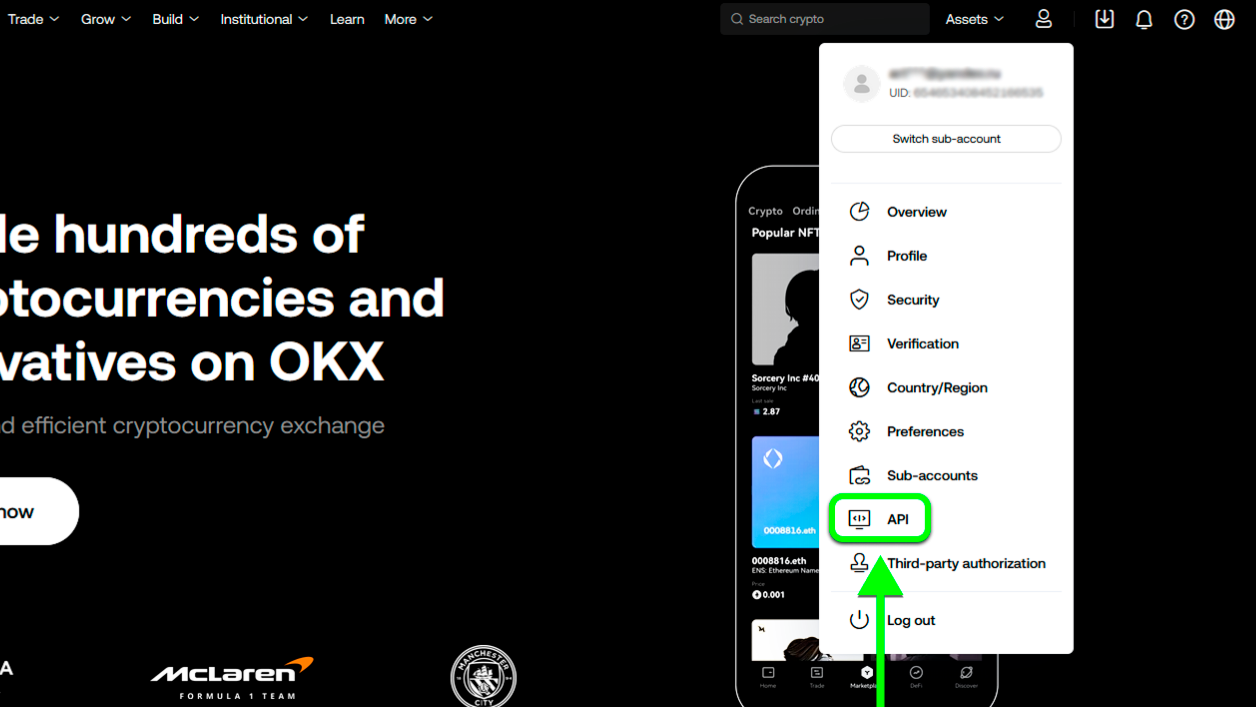
After logging into your OKX account, go to the “Account” tab in the dropdown menu. Or simply use this link and start directly from Step 3.
Step 2.
Go to the “API” tab in the “Account” page menu.
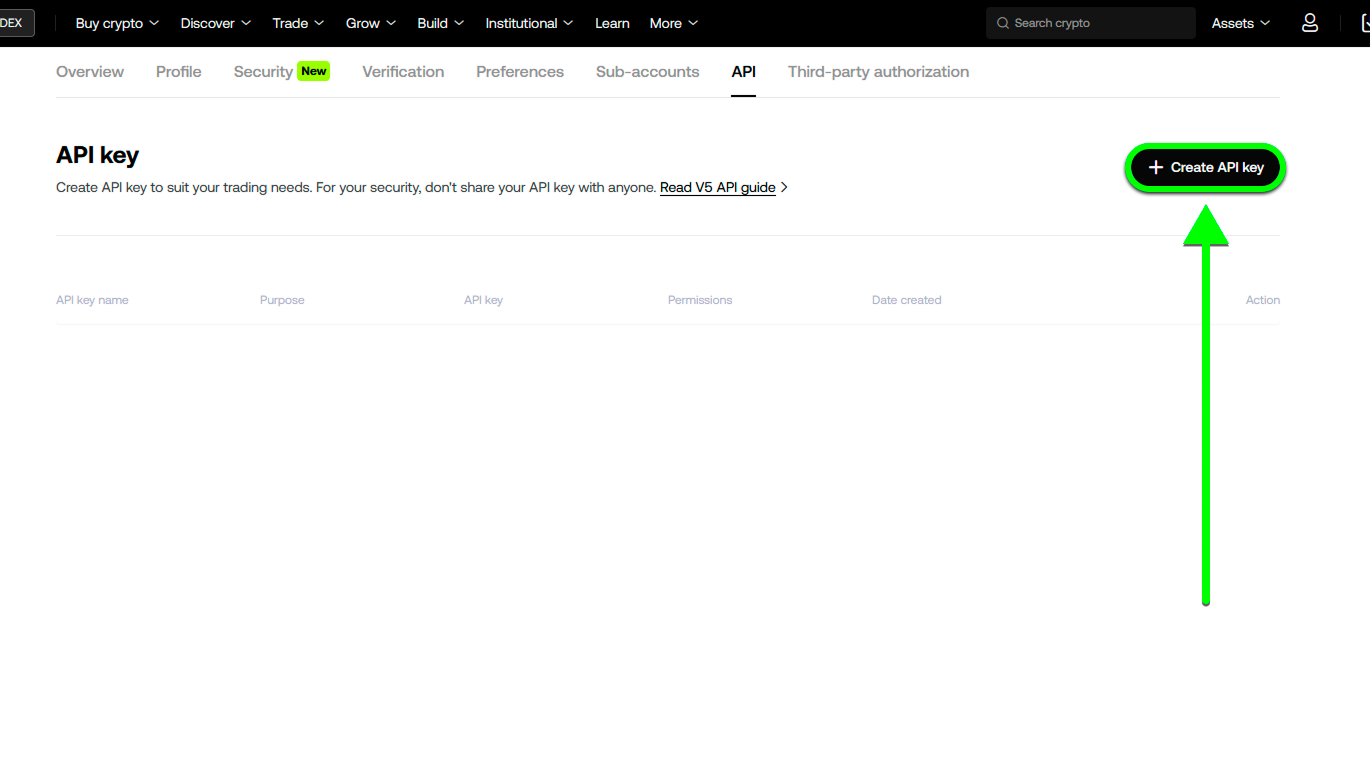
Step 3.
On the API Key page, click on the “Create API Key” button.
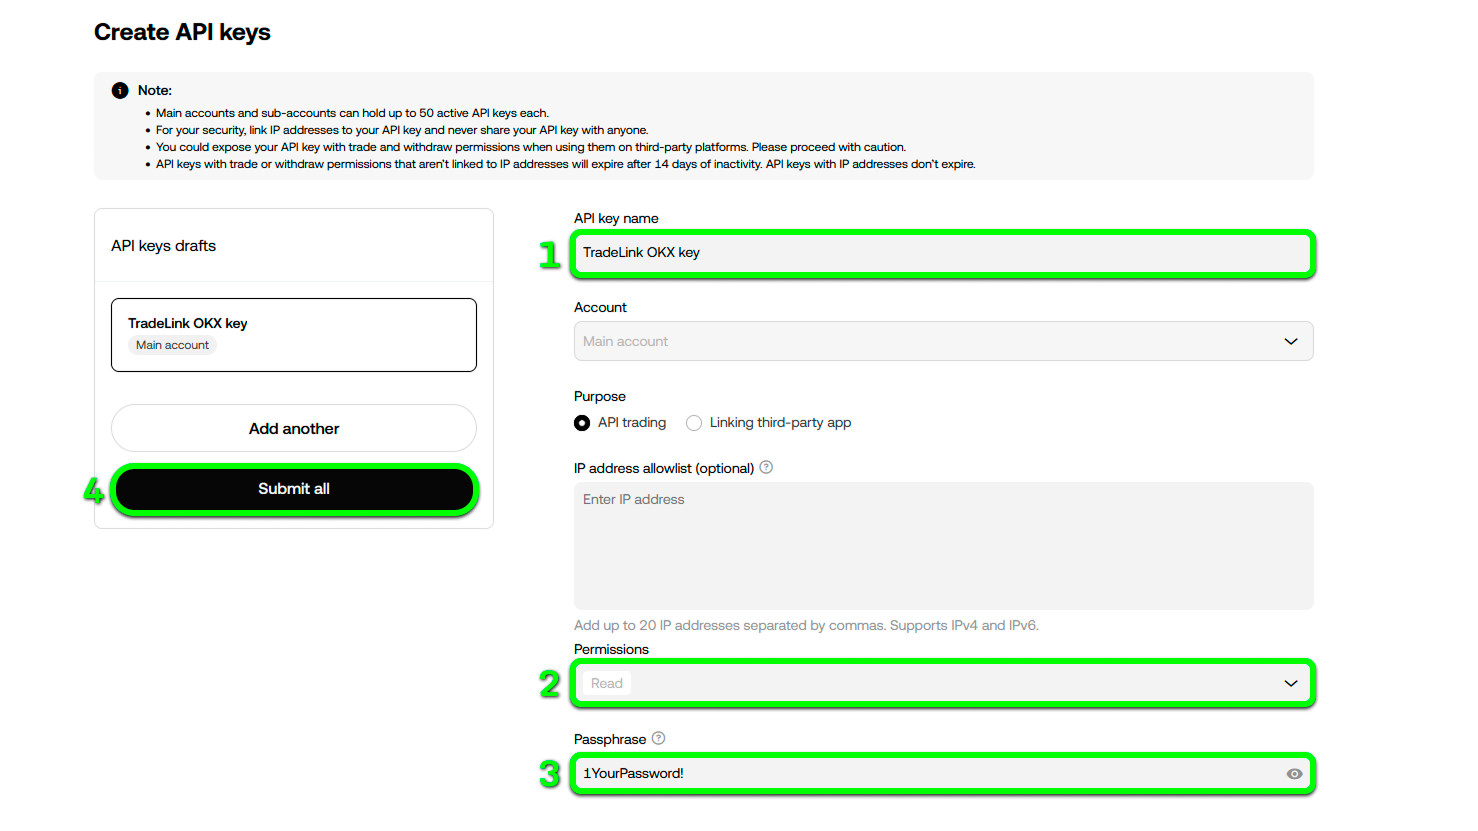
Step 4.
In the API key creation window, you will be asked to:
- Choose the API key name (you can name it as you wish).
- Make sure to select “read” permission.
- Create a strong API key password. Be sure to save it and do not share it with anyone.
- After completing the above steps, click on the “Submit All” button.
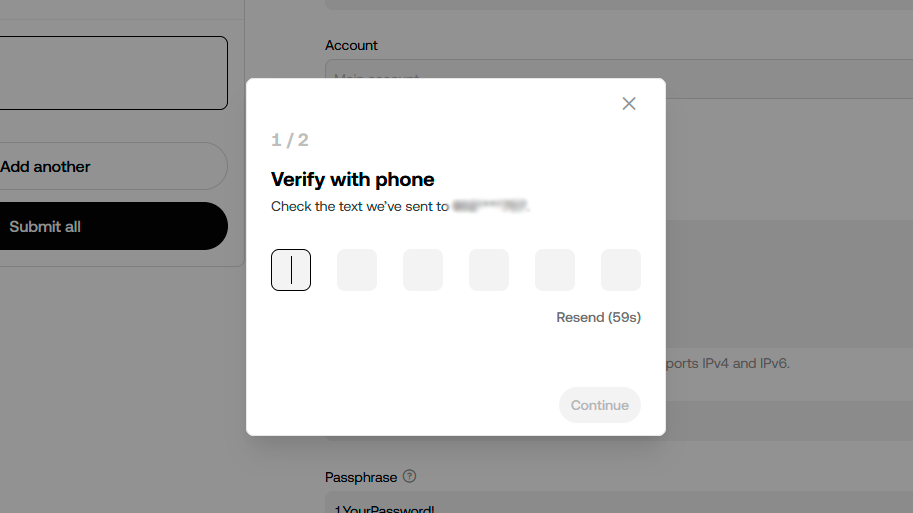
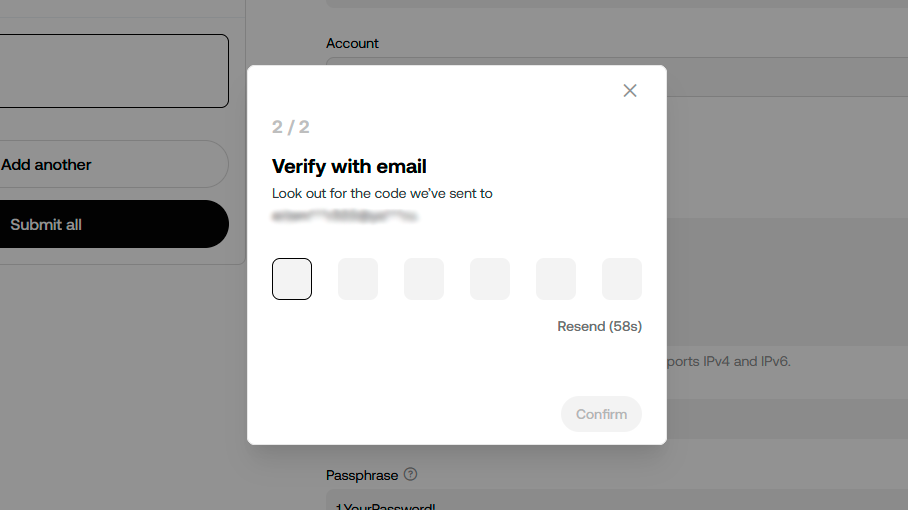
Step 5.
Confirm the creation of the API key.
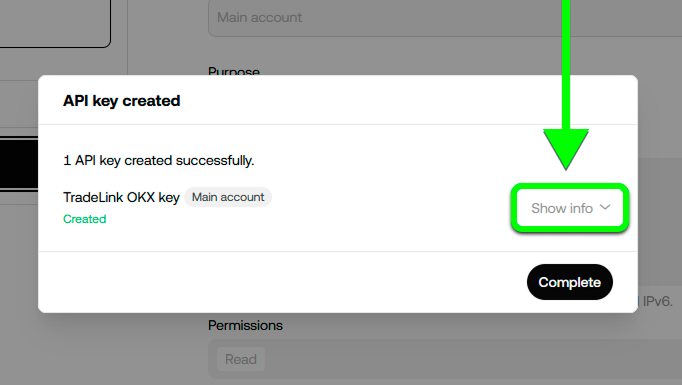
Step 6.
Click the “Show Details” button to open the menu:
Step 7.
In the opened tab, save and copy the “API Key” and “Secret Key” data, and do not forget the password you specified in Step 4.
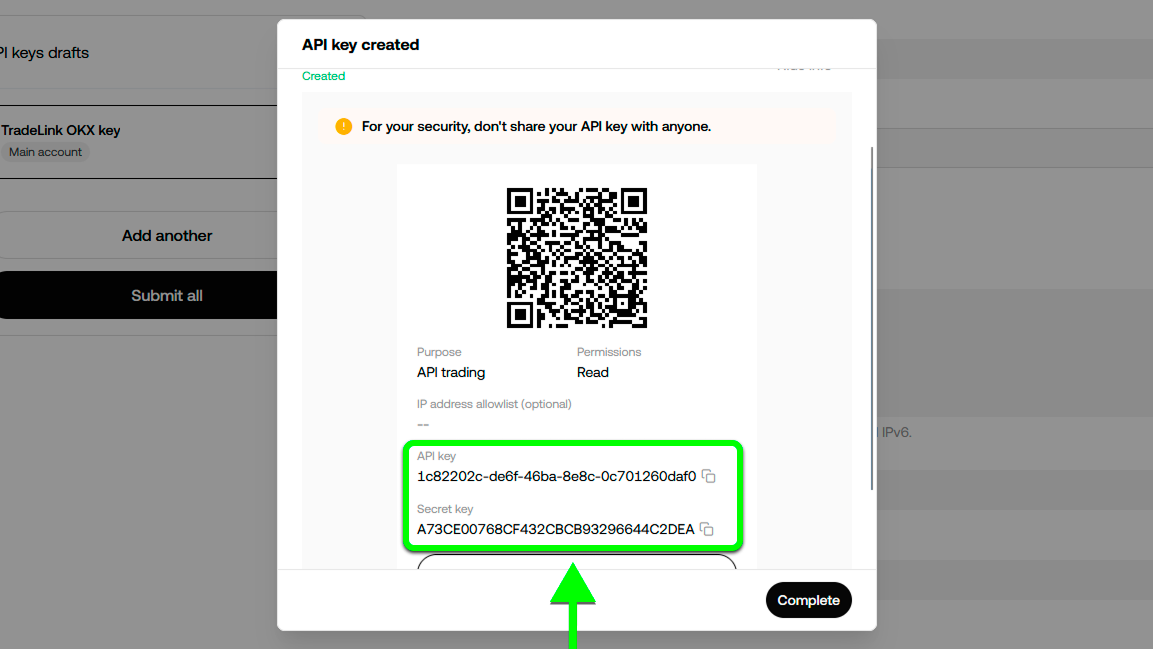
After saving the data, complete the API key creation.
Congratulations! You have created a read-only API key.
Adding the OKX API key to TradeLink Passport
Now that you have an API key from the OKX exchange, to view your statistics, you need to log in to the TradeLink Passport website and follow these steps:
Step 1.
Go to the TradeLink Passport website and click the “Add Key” button.

Step 2.
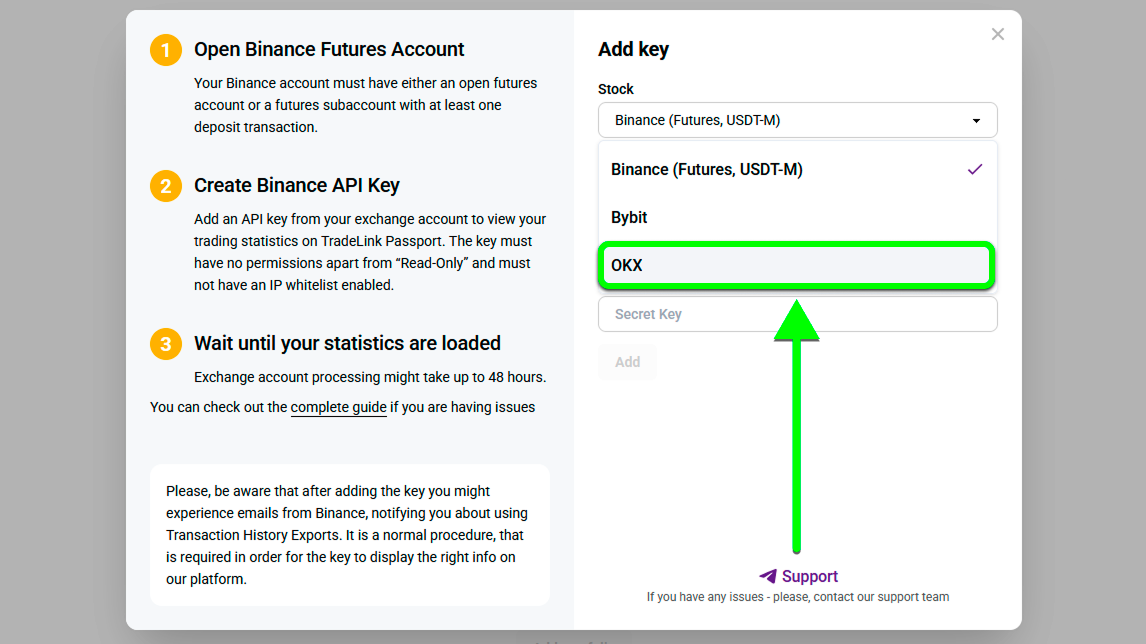
Click the exchange selection button in the pop-up window.
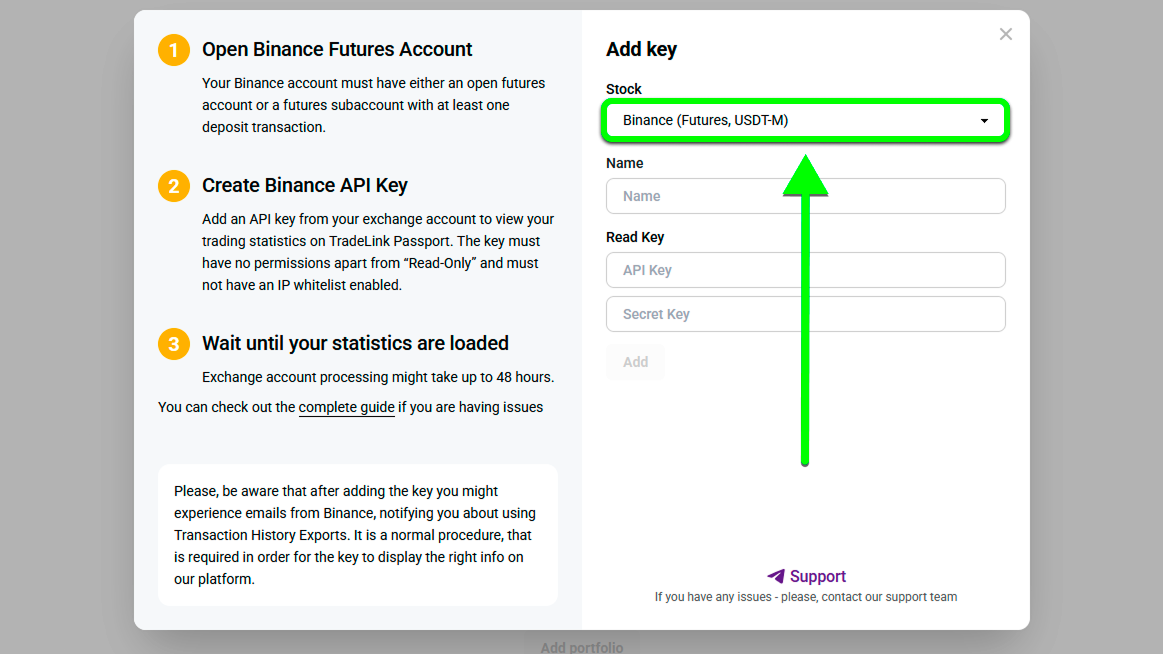
Step 3.
Select the “OKX” exchange in the selection field:
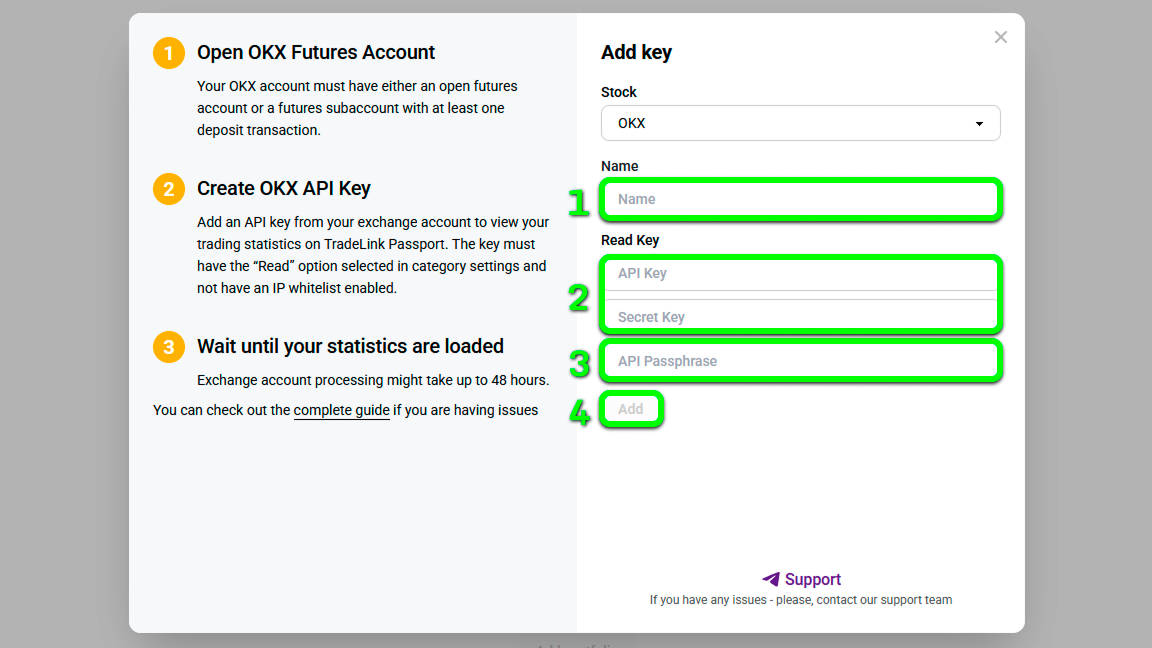
Step 4.
Enter the data from the previously created OKX Exchange API key:
- Enter your Key name (any name you prefer).
- Enter the API key and Secret key data.
- Enter the password you specified when creating the API key on the OKX exchange.
- After completing the above steps, click on the “Add” button.
Step 5.
Congratulations! Your OKX exchange API key is now linked to the TradeLink Passport.
If everything went well, you will see the following window:
Now you can use the TradeLink Passport service and explore its features!
We hope this article answered your question. If not, we will be happy to answer any questions you may have through the support link available in the “Add Key” window.